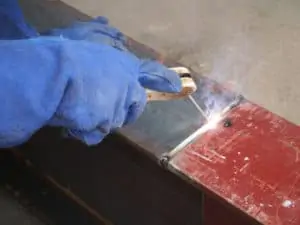
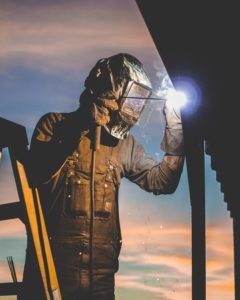
For stick welding, learn safety protocols, choose the right electrode, clean work surfaces, adjust amperage settings, master striking an arc, control travel speed, maintain proper arc length and rod angle, use appropriate joint preparation, and practice different weld positions to improve your skills.
Like any welding process, stick welding can be improved through practice. Here are a few tips to help you get started:
Table of Contents
1. Be able to see what you are welding
If you use a welding mask or helmet with dirty or scratched lenses, it is probably time to replace them. If you keep an extra set of replacement lenses on hand, you are more likely to replace defective lenses when it is time.
But, if you are like me and don’t keep a spare set of lenses, we are more apt to think we can do just one more job with these old second-rate lenses and then swear we’ll pick up a new set later.
Then, we tend to put the helmet up when finished and forget about it until the next welding project.
It may be time to upgrade your welding helmet altogether. Did you start with a cheap one or maybe an older style? If so, you must experience a quality helmet with a larger viewing area, auto-darkening, and an adjustable shade feature.
If your eyesight isn’t what it used to be, ensure your helmet accommodates a magnifying lens.
Below are the top three welding helmets I highly recommend you check them out
Lincoln Electric Viking Auto Darkening Welding Helmet
- Large 12.5 Square Inch Auto Darkening Lens
- Premium Optics with a Crystal Clear View
- Comfortable Adjustable X6 Headgear
- 3 Year Warranty
Antra AH6 Auto Darkening Welding Helmet
- Full Face and Neck Protection
- Highly Responsive Arc Sensors
- Extremely Lightweight Design for Reduced Muscle Fatigue
- Sonar Panels Extend Battery Life
YESWELDER Solar Powered Auto Darkening Welding Helmet
- Suitable For TIG, MIG, MMA
- 8 Square Inch Viewing Area
- Comes with Replacement Lenses
- Comfortable Pivot Style Headgear
- Get 10% Off with Discount Code 'BWG' at Yeswelder.com
TIP: Read more about in my post: 10 best welding helmets for beginners.
2. Know your machine
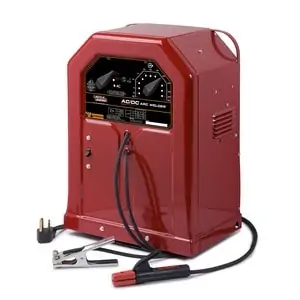
If your machine is an AC-only welder then you have no other polarity choices. If you have an AC/DC welder then familiarize yourself with the pros and cons of each setting.
With direct current, a.k.a. DC, you can weld with either straight or reverse polarity. This means that the electrons in the current will only flow in one direction. Never both ways simultaneously like with alternating current, a.k.a. AC.
So, with three polarity choices, which one will be the best for the job in front of you?
Below you can see my best three choices.
Amico 200 Amp Stick/TIG Welder
- Powerful Capable of Welding up to 3/8 inch Stainless Steel
- Almost Non-Existent Spatter and Post-Weld Cleanup
- Dual Voltage Input - 110V/230V
- 13 ft Torch Cable
- 115V or 230V Input Supply Input
- Extremely Lightweightt 18 lb with Adjustable Shoulder Strap
- Roll Cage Design
- Large TFT Screen
YESWELDER Arc Welder 205 Amp Stick Welder
- Powerful Up to 205 Amps
- Automatic Compensation for Voltage Fluctuation
- Extremely Portable at 10 lb Weight
- Very Cheap Option to Test the Waters of Stick Welding
NOTE: AC current is really not a polarity as the current itself reverses polarity 60 times per second - 60 hertz
3. Know when AC current is the best choice
Again, if AC is your only choice, just be sure you use rods specifically for AC welding. If you have a choice between AC and DC, you may choose to only use the AC setting when welding on magnetized metal.
A good example of magnetized metal is tubing and rods in rod-pumped water or oil well. The friction between the rods and tubing as the rods cycle up and down several times a minute will quickly magnetize the steel.
Once the metal liquefies in the welding pool, magnetized steel tends to blow or push the molten metal away from the pool. This is better controlled when welding with AC.
Otherwise, most welders with the option will perform 90% or more of their work welding with DC. It is easier to start the arc, keep the arc going, it welds smoother, and is more consistent, and spatters less.
4. Know which DC polarity is best and why
Since the current flow is either one direction or the other depending on the DC setting, it is fairly easy to understand what is actually happening when welding. What might be a little confusing for some is that the industry uses two sets of terms to describe the two settings.
Straight and Reversed is one way to distinguish the polarity. The other is Positive and Negative polarity. The latter description may be the less intuitive of the two.
Straight and Positive are describing the same polarity direction, as is Reversed and Negative. Since most DC machine dials are marked with the + and – symbols, we’ll stick with the terms positive and negative to define the settings as we continue.
Most people will do the majority of their welding on DC+. This means the current flows from the machine to the base metal, then up to the electrode and back to the machine to complete the circuit.
The consequence of the current flowing through the base metal first is that an estimated 65-70% of the heat generated will be created in the base metal. This helps to gain more penetration.
Conversely, when the current is reversed to the DC- setting, the current will flow from the machine through the electrode to the base metal and back to the machine to complete the circuit.
With this setting, the electrode will receive more of the heat this time. This results in less penetration. It also makes the electrode burn off at a higher rate creating more deposition, and making welding thinner metals easier with less burn-through.
5. Know which amp/current setting is best for your electrode
There are more 1/8” welding rods sold than any other size. So. Let’s use this rod size to find the best starting point for our amperage setting. If the rods do not specify, the rule of thumb is one amp per .001 in rod diameter.
A 1/8” rod is .125 inches in diameter. Therefore, a good amp setting to start with is 125 amps. Adjust 5-10 amp increments until the desired setting is found.
6. Know the correct arc length
The arc length is the distance between the rod tip and the pool when welding. Again, using a 1/8” rod for our example, the rule of thumb suggests keeping the arc length at 1/8”, the same distance as the rod diameter.
KEEP IN MIND: The rod diameter is the diameter of the steel portion, less the flux.
If the arc length is too short, the rod will tend to weld poorly and stick more often. If too long, you will create more spatter and get less deposition to the weld.
7. Know the correct rod angle
For welding in the flat or overhead position, hold the rod at approximately a ten-degree angle with the top of the rod leaning towards the direction of the weld. This is also known as the drag or backhand technique.
When welding vertically and uphill, tilt the rod the same ten degrees but in the opposite direction of travel. This method is known as the forehand or pushing method.
To estimate the ten-degree angle, picture a straw laying to the side of your glass of tea, which should be close to +/- ten degrees of angle.
8. Know the correct way to move the rod tip
There are several ways a welder might maneuver the rod tip and, therefore, the pool during welding. For ¼” thick metal or less, a steady drag with no lateral motion imparted on the tip is probably best.
Using a half-moon or L shape motion when making a T weld, may be helpful at times. This would be maneuvering the rod up on the vertical portion while pulling the puddle slightly forward as you work the rod tip down to the horizontal piece.
Then, working the tip slightly up and back, down and forward. This would only be necessary when welding thicker metals. Be careful not to undercut the base metals.
Some will make a Z pattern or a semi-circle pattern with the rod tip on thicker, flat metal to make the weld slightly wider. Another method is the hesitate and drag technique keeping the rod tip in line with the weld with no lateral movement.
9. Pay attention to how fast you are welding
Travel speed is essential. Travelling too fast will result in poor penetration and the possible formation of pinholes or porosity. The bead will also be too narrow, the deposition will be inadequate, and the base metals will often be undercut.
Overlap, also known as cold lap, happens due to moving too slowly. This forms as the result of excessive deposition and lack of penetration. The weld appears to sit on top of the base metal instead of becoming part of it.
In other words, the tie-in on the edges of the weld may not be smooth and uniform.
 10. Keep your electrodes dry
Rods that have soaked moisture from the surrounding air will weld poorly. Damp rods may cause the arc to be rough and erratic. If you have the correct polarity and are welding in the recommended amperage range for the rod you are using, and your rod is not burning smooth and consistent, your rods may be damp.
To remedy this problem always store rods in a sealed container when not in use.
Discard electrodes if the flux becomes flakey and separates from the steel easily. Many welders will store their rods in an old discarded refrigerator.
This aids in keeping moisture away from electrodes. It is also handy to store anything else you want to keep dry and dust-free. If you have no dry rods to finish your job, try sticking the rod to the base metal for a few seconds.
This will cause the rod to heat up very quickly, which may help evaporate the moisture held in the flux. The rod will become red hot in just a few seconds. Therefore, do this only as a last result and with caution.
11. Clean the base metals before welding
To help ensure that there will be no porosity in your weld, thoroughly clean all mill scale, rust, dirt, moisture, grease, and oil from the surface to be welded. This can be accomplished with a wire, flap, or grinding wheel on an angle grinder.
A wire brush may get the job done if it’s not too bad. If, for some reason, you cannot clean the metal, be sure to use E6011 rods.
When welding on less than clean base metals, slow your welding speed and slightly increase the pool size, allowing more time for additional gas bubbles to migrate out.
12. Perform a dry run
It can be very helpful to perform a dry run with your electrode before welding, especially if the weld is in a tight area.
With the power off, test where your hands need to go and if there will be sight obstacles as you move around the proposed weld. Identify areas where you may be welding out of position and have issues keeping the proper rod angle.
You may find it best to stop your weld strategically to reposition yourself more conducive to maintaining proper sight and technique. It will be better to identify these spots ahead of time.
Before you get to them during the actual welding phase.

13. Have fun
Take pride in your work. Things built out of steel will be around for a long time. Be able to step back, admire your work, and take pride that you have built something that will be around for a long time for others to admire.


