To weld aluminum, clean the surface and remove oxide layers. Use AC TIG welding with a pure tungsten or zirconiated tungsten electrode and 100% argon shielding gas. Alternatively, try MIG welding with a spool gun and 100% argon gas. Select the appropriate filler metal based on the aluminum alloy.
You are probably familiar with the appearance of a great aluminum weld. A skilled welder can create an aluminum weld bead that looks like a stack of dimes and is consistent throughout. Perhaps you have heard about the challenges involved with welding aluminum. This point brings to light the questions:
- Why are these really nice aluminum welds so hard to achieve?
- Why is welding aluminum so challenging?
- What welding machines are best suited for aluminum?
Table of Contents
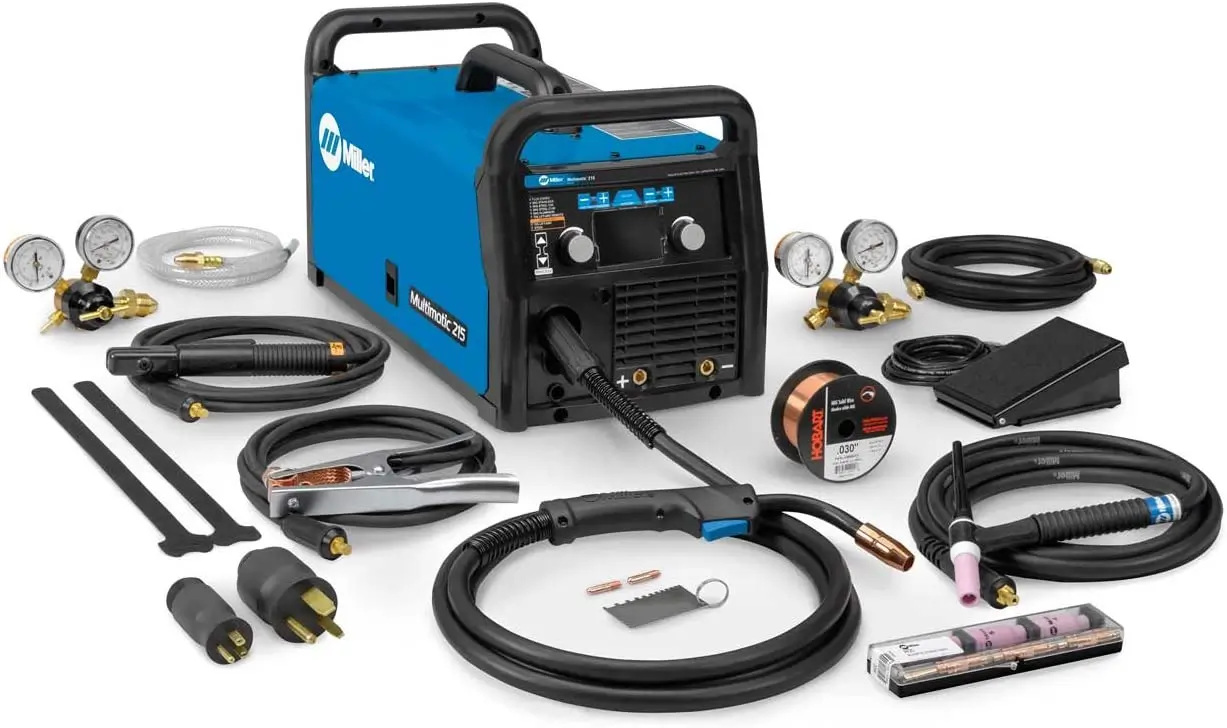
Aluminum Welding Equipment
This article focuses on TIG welding aluminum since it is widely used for the aluminum welding process. Just know that TIG welding is not the sole technology for the process. TIG welding and MIG welding can both achieve good welds in the aluminum material category.
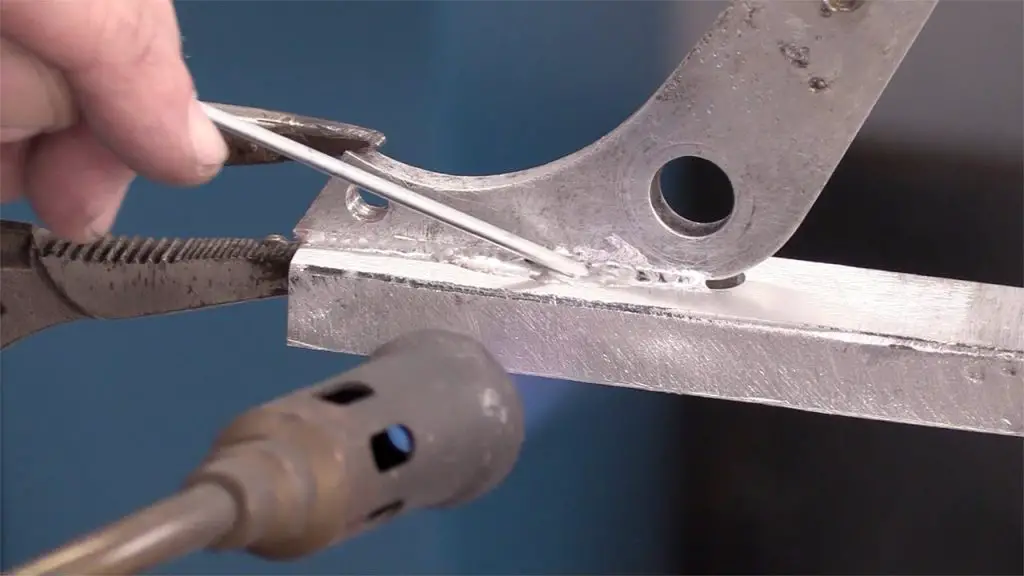
The difference between TIG welding and MIG welding equipment is drastic. TIG welders use a tungsten electrode which keeps the weld puddle formed. Simultaneously, the welding operator manually dips a filler rod material into the puddle. In contrast, aluminum MIG welding equipment is specialized specifically for the process.
To use a MIG welder to weld aluminum material together, you need what is called a spool gun. The spool gun houses a coil of aluminum filler material spooled into a cartridge. This cartridge is located on the handle of the MIG welder. The reason that the aluminum filler wire must be fed through the spool gun is quite simple.
Unlike ferrous filler wire materials, the aluminum filler wire material does not have the rigidity to withstand being pushed or fed through the bends of a MIG cable up to the handle. Since using MIG spool gun is not as common in this beginner welding category, this article focuses on the TIG welding process of welding aluminum.
There is a wide array of options and features to select from while in the market for a TIG welder. Below are some of the features that separate more economical TIG welders from higher-performance TIG welders.
Economical TIG Welders
The main factors which cause a welding machine to be more economical in price are its:
- Cooling system
- Peak amperage range
- Duty cycle
- Accessories
More economical TIG welders for welding aluminum still have the minimum requirements necessary such as:
- AC current capability
- Cooling system
- Ruggedness
But these features will be limited. There is nothing wrong with using a quality TIG welder with fewer features. It is simply a matter of application.
How often will you weld aluminum?
You might not be making welds every day, multiple times a day, for extended periods; you might just need to weld a few parts together every so often. Nonetheless, economical-grade welders have their place in the market. A critical aspect of a welder used for TIG welding is its cooling capabilities.
Since aluminum naturally has a higher melting point than other ferrous materials, the welder has to achieve higher amperages. Higher amperage creates the heat necessary. More economical welders use an air cooling system. They do not have any special ways of cooling the TIG torch. For this reason, a weld cannot be extra long or large. This would require the arc to exist for longer periods of time, creating too much heat.
Economical TIG welders also cannot reach the higher amperages needed to weld extra thick pieces of material. This can be mitigated somewhat by pre-heating the workpiece but to a limited extent. Smaller welders simply don’t have the penetration power needed for those larger welds in thick aluminum materials.
Due to the heat involved when welding aluminum, you have to take breaks. Especially during a longer aluminum weld. Not doing so risks damaging your equipment. See your owner’s manual for exact duty cycle ratings. Short-duty cycles can be inconvenient when you need to perform longer welds.
In addition, the accessories which come with one of these welders are typically limited to a:
- standard welding torch
- standard foot pedal
- regulator
Tip: When considering overall costs of welding equipment, don’t forget to factor in the cost of your bottle of argon shielding gas. Pricing depends on availability in your region, but larger bottles can be expensive.
High-Performance TIG Welders
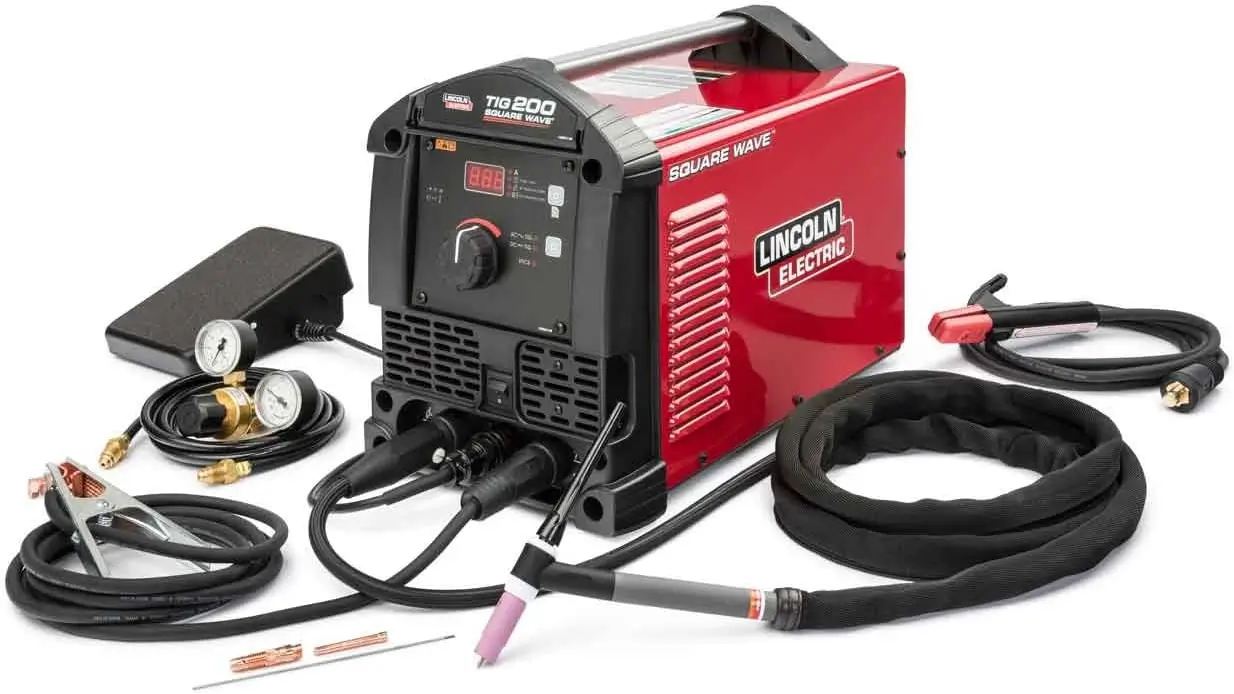
As discussed in the previous section, high-performance TIG welders for aluminum materials have everything that the economical grade welders have, but much more. High-performance TIG welders have integrated water cooling systems which dramatically decrease the build-up of heat in the torch and in the machine.
These cooling systems function largely in the same way as the cooling system in your car. This is done by reducing heat buildup in the water by passing cool air over a radiator inside the machine. These machines have a higher amperage range and a longer duty cycle. Mainly, due to the heavier duty components in the welding machine.
Accessories included with high-performance machines are generally higher-end themselves. Such as:
- Ergonomic TIG torches
- Precision gas regulators
- Precision foot pedals (with better resolution)
- Heavier duty clamps and torch accessories
Beginner welders probably don’t need this level of welding machine. Especially considering the significant increase in cost. But if budget is not a concern these welders will increase your enjoyment of the welding experience.
Aluminum Welding Procedures and Technique
Preparing your material before welding is always very important to do correctly. There are two reasons why you have to clean your raw aluminum material.
- Aluminum naturally forms an oxide layer on its exterior surface while it is cooling off at the factory
- Cleaning oils and contaminants on the surface left by handling the material
There are two steps to cleaning the surface of your aluminum before starting your weld
Step 1: Cleaning
Remove the oils and contaminants from the material’s surface. It is important to perform this step before any brushing. Brushing can push contaminants further into the material. You can use acetone to clean the surface of the material. Or, other surface cleaners specifically for aluminum preparation.
Step 2: Brush the Surface
Brush the surface of the aluminum material to remove aluminum oxides. This oxide layer is usually not difficult to remove from the surface of the material using a brush. Always use a stainless-steel brush for this step. Because using a carbon steel brush will only introduce ferrous contaminants into your aluminum. Thus causing weld quality problems due to the impurities introduced.
As you can see, keeping your aluminum clean is very important. You will notice a major difference in your weld quality when welding a well-cleaned aluminum joint.
Tip: Mark your different brushes with “Steel, “Stainless,” and “Aluminum,” so you don’t get the different brushes mixed up. You don’t want to accidentally use a brush which you always use on carbon steel on your aluminum material. This will result in an impure and low-quality weld.
Tip: Always use domestic (USA) melt source aluminum if your weld is critical. Aluminum sourced from countries overseas, especially China, frequently has impurities in the material which will result in poor weld quality and joint strength. You will see a significant difference in price between domestic and non-domestic aluminum. What you save in money with cheap materials you will sacrifice in weld quality. Most reputable online and local material suppliers will have domestic aluminum available for sale.
Step 3: Machine Preparation
Make sure your welding machine is set to your desired settings. The selector switch on your machine should be set to Alternating Current (A/C). The amperage range should be set toward the upper range of your machine. This is more precisely controlled by your foot pedal, of course.
Your TIG electrode should be pure tungsten due to the better durability and purity. The electrode should not be sharpened to a sharp point since the rough alternating current could cause the very tip of your electrode to break off and could fall into your weld. Your shielding gas should be pure argon gas for optimal weld purity and performance while welding aluminum.
Tip: An optimal weld setting that works for someone else might not work the same for you. Keep a “cheat sheet” of your best welding settings so that you can repeat your best welds. You can tell when you have laid down an excellent bead.
You will feel good about it. Now go one step further and write down that setting so you can repeat it next time. This is especially helpful when you share a machine with a coworker. You will then be able to repeat the magic!
Aluminum Welding Process
Pre-Weld Checklist
Consider this your “pre-flight” checklist, similar to how pilots ensure their aircraft is in order before taking off. Do you have all of your equipment set up for your welding operation? You should run through a checklist to make sure everything is set up and ready for your welding operation.
Your checklist should include at least the following items:
- Make sure there is nothing around your workpiece that can catch fire
- Set your amperage
- Ensure your current is set to Alternating Current (A.C.)
- Check your machine for the proper amount of coolant (if it is water-cooled)
- Tighten all connections on your TIG torch cable and hose
- Examine the electrode so that it is both in good condition and has the proper amount of “stick-out”
- Open the valve on your bottle of shielding gas
- Set your shielding gas regulator to the proper amount of flow
- Turn on and adjust your auto-darkening welding helmet
- Wear all of your PPE
Tip: Since there are so many items to remember before beginning your weld, it may be helpful to create your own list on a piece of paper and attach it to the top of your welder so you can reference it easily.
Personal Protective Equipment (PPE) Ready
Ensure that all of your Personal Protective Equipment (PPE) is in place and properly functioning. Since safety is always of the utmost importance in the field, always make sure your PPE is on your person and functioning before starting your weld. As discussed in other articles, your PPE essentials for welding are:
- Safety glasses
- Hearing protection
- Steel toe boots
- Auto-darkening welding helmet
- Welding gloves
- Leathers/flame retardant coat
- Flame-retardant headwear
Even though the above are all important to use while welding, for TIG welding aluminum you could choose to focus primarily on the following PPE items:
- Safety glasses
- Auto-darkening welding helmet
- Welding gloves
Always make sure you are wearing your safety glasses while in a welding shop. Especially while grinding TIG welding electrodes. TIG welding electrodes, typically tungsten material, need to be cleaned up using a bench grinder following any sort of contamination issues while welding. Needless to say, bits of tungsten flying through the air while grinding your electrode are very hazardous.
Helmet Shading and Gloves
Your auto-darkening helmet needs to be adjusted to the correct settings for TIG welding aluminum. Since the amperage used is typically higher than when welding other materials, you should increase the shade level to match the intensity of the arc light. Please read your welding helmet manual for instruction regarding properly adjusting your welding helmet. Additional information surrounding the potential dangers to a welder’s eyes can be read here.
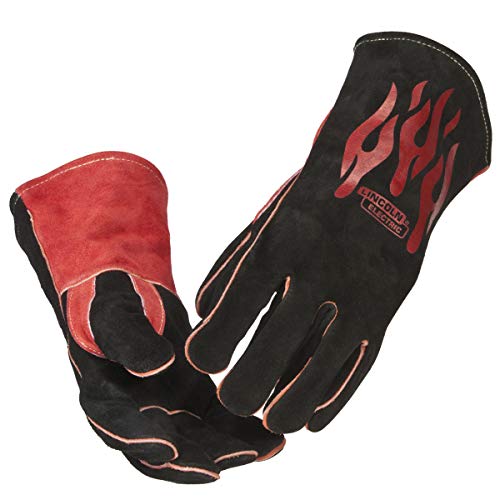
Selecting and using the correct type of welding gloves for TIG welding aluminum is important. Primarily to help you avoid painful burns on your hands. While the traditional welding gloves for TIG welding are thinner calfskin leather gloves, you might want to consider a thicker glove for welding aluminum.
Some welders prefer a thicker glove similar to the popular “Mechanics” gloves. Mostly since they are made from a thicker leather material, yet still allow full range of motion. Your preference might vary. So try a pair of gloves and at the worst case, you can hold onto them for a different use if you don’t like them for TIG welding aluminum.
- Reinforced Double Layer Kevlar Padding
- Guaranteed to Withstand Temperatures up to 932 F
- 16-inch Extra Long Gloves
- 1.5mm Thick Cowhide Leather
Lincoln Electric Welding Gloves
- High Grade Leather and Soft Cotton Liner
- Kevlar Threading and Leather Reinforced Stree Points
- Inside Cuff Lined with Twill Cotton to Absorb Moisture
Miller Electric Welding Gloves
- Fully Welted Seams
- 13-inch Cowhide Leather
- Comfortable Black Liner
Visualize the Weld Path and Angles
Right before starting your weld it is always helpful to visualize the welding process. Specifically the actions you will need to take in order for your weld to be successful. It may help to close your eyes for a moment and visualize the angles which your electrode, your filler rod, your electrode handle, and your foot pedal need to be throughout your the process.
If you start your weld without this type of visualization, there is a good chance that at a corner transition of your weld you might not use the correct angles and your weld might fail. Additionally, suppose you don’t use this type of visualization method. In that case, there is a good chance that a few inches into your weld bead when you have to adjust the position of your hands you might start using an incorrect electrode angle or filler rod angle. Elite athletes use visualization techniques prior to the start of an event. Athletes use these techniques for the same reasons as welding technicians – to maintain optimal focus throughout the event.
Create Your Weld and Don’t Dwell
Using the high-frequency arc-starter function, push your foot on the foot pedal to start your arc. Your mind should be focused on the size of the puddle and where the extent of the puddle are located on either side of your joint. This is controlled with your torch angle. Get into a rhythm of creating the properly sized puddle, dipping your filer rod into the puddle, removing your filler rod, advancing your torch forward, and repeating. Even though you have to wait for your puddle to form under the welding torch, once it does, you have to move rapidly.
If you don’t have a sense of urgency while TIG welding aluminum you will end up with a:
- Weld puddle that is too big
- Heat affected zone that is out of control
- Bend in your workpiece or a blow through the workpiece altogether
This is where experience plays a big part under the welding helmet. That is knowing how to adjust your welding parameters “on the fly.” Whether this means applying less amperage via your foot pedal, adjusting your torch angle, speeding up, slowing down, or a combination of variables.
Inspection (Pass/Fail)
Beginner welders don’t typically have to be concerned with passing a weld inspection. But, they should be aware of the real-world implications. In the real-world aluminum joints exist in ultra-high requirement applications. There are aluminum welds holding together race cars, airplanes, and other life-critical purposes. Aluminum welds in these applications are scrutinized for quality before approval.
Some of the high-end inspection methods include fluorescent penetrant inspection and x-ray inspection, at a basic level, looking for cracks in the weld. A more simplistic approach which beginner welders can use is to see if the weld has any visible cracks, see if the weld is consistent from start to finish, and see if the root of the weld is the proper size. Do not be concerned if your welds don’t pass this mock inspection – simply start over again and practice until your welds look great.
Tip: If your weld is cracking down the length of the bead, your workpiece could be getting too hot or your filler rod might be an incorrect match for your base material. Either adjusting your amperage settings or performing a bit of research online to see which filler is best for your alloy of aluminum should solve this issue.
More Tips for Aluminum Welding
I have written a comprehensive guide to aluminum welding that you may find useful.
Optimal Conditions
Sometimes your technique could be spot-on, but your surrounding environment is causing your welds to suffer in quality. One environmental issue which could cause your weld quality to diminish is the wind. If there is a wind or even a breeze, your shielding gas could disappear and not properly shield your weld. Without shielding gas surrounding your weld puddle, the natural atmosphere we breathe causes porosity and unclean welds. This is the case with all welding technologies, but especially in TIG welding when welding non-ferrous materials such as aluminum, titanium, and high nickel content superalloys.
This shielding gas issue can be resolved simply by putting up screens to block the wind and/or turning up the shielding gas output. Please be cautious about blocking off ventilation from the room which you are welding in since the shielding gasses and the fumes from welding can be extremely hazardous.
Relax
Learn to relax while you are performing your weld bead. You have learned that TIG welding is a very manual process which takes ultimate concentration and skill, all of which can result in getting stressed and tense while creating your weld bead. If you intend on welding more after your first weld bead for the day, you simply won’t last if your body is tense – you will be fatigued and your subsequent weld beads will suffer.
It comes with practice, but if you put yourself in a relaxed state prior to starting your arc and continuing that relaxation through your weld, you will only see positive results. This relaxation allows you to better focus on your weld puddle, your filler dipping technique, and on your heat affected zone. In contrast, if you tense up due to panicking about your weld, you will forget to focus on your weld puddle, your filler dipping technique will go down the drain, and your heat affected zone will probably grow out of control.
Get Comfortable
Getting comfortable is one of the keys to concentrating on making a great weld. The TIG welding process typically allows the welding operator to sit at a bench and weld the workpiece in position. You should take advantage of being able to sit down and weld. Often, a weld will look poorly due to the welding operator not being comfortable. For example, a crooked wrist, a strained back, or a hurt ankle due to an out of position foot pedal can all cause the operator to be distracted and result in a poor weld.
You should turn and clamp the workpiece to a more comfortable position, get a better pad for your chair, and make sure your foot pedal is in a good spot.
These small adjustments can result in big improvements in your weld quality. Sometimes you are not able to get completely comfortable while performing your weld; for example, if you are welding out of position on a fixed workpiece. In this case, try to get as comfortable as possible stacking as many variables in your favor. Additionally, take a short break (if possible) if you are welding out of position to rest your arms or back since a fatigued welding operator typically results in poor weld quality.
Ask for Help
As the workforce in the welding industry ages and more of the workforce moves to retirement (this is a topic for another article) innumerable experienced welders would be happy to pass on the trade to someone who is willing to listen and learn. You are bound to eventually get frustrated with learning the welding process.
There are so many small techniques and tidbits of experience which you need to learn in order to master the trade.
Do not be discouraged if you cannot achieve a good-looking aluminum weld bead after three or four weeks of trying. Instead, reach out to an expert and ask for help. This help can be found in many places, whether at an instructional welding course at a vocational school or community college, senior coworkers at your job, or even from YouTube videos. The resources are out there, it is just a matter of realizing that you are not alone in being frustrated with learning TIG welding and asking for help.
Practice makes perfect
This tip might be as obvious as it sounds, but in the case of welding aluminum, it is extremely true. Welding aluminum is no less than an art form. There are numerous parameters which must be set in the machinery, and as previously discussed those parameters are dependent on different variables.
There are numerous conditions which you must be aware of while you are under your helmet and welding – experience and skill will tell you how to fix issues on the fly. TIG welding aluminum requires finesse: controlling multiple variables all at once in order to create a great weld.
Master welders will tell you that only once you think you know everything is when you actually know nothing. There is no substitute for experience in the field of welding, but education and practice will help accelerate your gain of that valuable experience.
Conclusion
Since welding aluminum is so challenging to master, it is immensely rewarding as a result. There are always opportunities in the job market for skilled welders who can successfully weld aluminum. Many of these career opportunities are either in the aerospace or the shipbuilding industries. You should weld as frequently as you can in order to continuously improve your skillset and always be optimistic about laying down a great weld.


