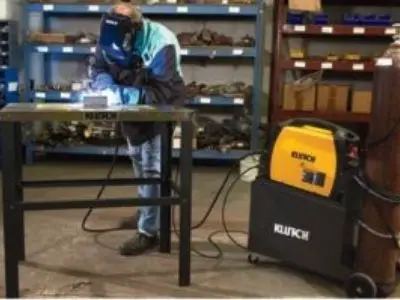
Yes, welding tables are essential to keep your welding project stable, comfortably off the floor, and conduct enough electricity to ground your welder.
Working in a shop or garage without a welding table can easily be done. I’ve been doing it most of my life. But I’ve always wanted one. There has always been a desire to build one. There were a thousand instances where I’ve said to myself, “A welding table sure would be handy right now.”
I now have one started and plan to finish it soon. And, I know the moment it is complete, and I use it for the first time, I will wonder why I hadn’t built it sooner.

The fact that I am finding it more time-consuming to resume standing from an, ‘all over the floor position,’ is making the decision a little easier for me to make. It’s way overdue!
I think a great early project for a beginner is to build a metal welding table. It will be great practice and you will rarely need to weld from the floor after building it. You will enjoy welding much more by having your project at a height that makes welding less cumbersome. In addition, your welding has a good chance of progressing much faster if you can weld more easily and more comfortably.
The chances are greater that you will spend more time welding if you are more relaxed. An increase in practice time equates to increased experience. More experience equates to better welders.
Table of Contents
How to build a metal welding table?
My welding table will be 48″ x 48″, which will be smaller than most but will suit my needs just fine. It will be constructed so I can easily slide a vice on and off to get it out of the way if necessary.
Features of my welding table:
- My bench grinder and bench-mounted sander will be set up to attach and un-attach easily. They will be stored out of the way underneath the table when not in use.
- The frame is made out of 2 3/8″ tubing.
- The table top will be a half sheet of 3/8″ steel. If it were going to be twice as large, I might consider making the top out of 1/4″ to keep the weight down.
- It will have a 48″ long V made of 2″ x 2″ angle iron welded to one side. These are handy for laying joints of round or square tubing or even angle iron. When laid butt to butt they are aligned perfectly straight for tacking.
- Heavy-duty casters that lock will make it fully mobile yet immobile enough when the wheels are locked so I can get a little rough with my work without having to worry about scooting around.
How big should your Welding Table be?
Your welding table should be at least 4 feet wide and 4 feet in length with a thickness of 1/4 and 1/2 inches thick, and a height of 28 inches.
This will be directly proportional to the amount of space available to you. Unless you have a very large area far enough away from anything you don’t want welding or cutting sparks to come into contact with. It should probably have casters for mobility.
PRO TIP: Build the top out of as thick of sheet metal that you can without busting the budget or creating something so heavy it is no longer mobile. That is if it is meant to be mobile.
Should You build an overhanging tabletop or not?
Leave some overhang on at least one side, if not all the way around, to allow you to get close in. The closer you get to your work, the more comfortable you will be. Make sure your base is stable enough, so your table has a zero chance of toppling over.
NOTE: If your feet have room to fit under the stand then you will not need much overhang, if any at all. It's all about reducing the amount you must bend over in order to reach your project on the table.
Should you build shelving on your welding table?
A working area where space is limited can always make use of additional storage. The most often used items for your welding projects need to be close by but yet out of the way when you don’t need them. Having them on shelves directly underneath the work area will save time.
PRO TIP: In order to keep weight down, consider using expanded metal for the shelving.This not only reduces weight but allows any grinding dust or slag to fall through. You will have less dust buildup on your shelves to contend with.

How can I make devices easily detachable from my welding table?
The preferred way is to use square tubing. How large the vice is will dictate how heavy (thick wall) the square tubing will need to support it. I would stay within the range of 2″ to 2.5″ square tubing.
- Find two sizes of predetermined wall thickness due to vice size, where one will slide into the other with little to no room to spare.
- The receiver will be the larger of the two pieces of square tubing.
- A square tubing stinger welded to a plate to mount your vice will slide into the larger permanently mounted receiver.
- It is up to you to decide if you want to mount the receiver (stationary) portion vertically or horizontally.
- If you prefer vertically, don’t have the top of the receiver piece higher than your tabletop. This will negate the whole purpose of making the vice removable. This is to be able to clear the tabletop so larger projects can lay completely flat.
PRO TIP: If you want to save time, but spend a little extra, you can utilize receiver hitch parts which are already drilled for keeper pins to hold your vice in place.
How to make my welding table more usable?
The more planning you can do will certainly help in building a very usable table. The great thing about working with steel is that it’s easier to cut, splice, add, remove, and modify than wood.
However, designing it can be more than half the fun of building your table. Think efficiency when you are in the design stage.
You know, not too big, not too small, not too heavy, not too light. Create storage where you can but make sure when accessing your tools that there is no incumbrance to retrieving or putting them back.
Enjoy the process and marry some metal today!

