Easy MIG welding projects for beginners include making a fire pit, welding a basic shop stool, creating a BBQ grill, crafting garden decorations, building a toolbox, or constructing a simple bike rack. These projects help develop essential welding skills while creating practical and visually appealing items.
The article details step-by-step guides of two beginner welding projects – a bowl and a cube.
So you have decided to weld. You’ve done your research and you know the difference between MIG, TIG, and stick welding.
You decided on a good welding machine to practice with and you are wondering what now?
Well, as your friendly professional welder, I am here to help. The best way to start welding… is, well, to weld! And I know that sounds like the obvious answer.
Just stay with me here…
Let’s start using your welder so you get comfortable with it. You’re going to want to practice many many things and tackle them step by step.
Table of Contents
Beginner Welding Projects For You
I’ve been using these very same projects for many years to train new welders and they teach you all the basics like:
- proper cutting of stock metal
- proper preparation of the metal to be welded
- correctly fitting joints together
- use of magnets
- use of clamps
- role of a good hammer
- safe welding habits
- essential welding gear
I promise that you will make some mistakes along the way and that’s good!
These projects are designed to challenge you and build your welding skill set.
So let’s dig in and dive into my favorite beginner projects, and I have two that stand out right away.
The first project I have is The Bowl, and the second is The Cube.
I have also written a guide focusing on beginner welding projects that make money if you are looking to generate an income from your welding skills.
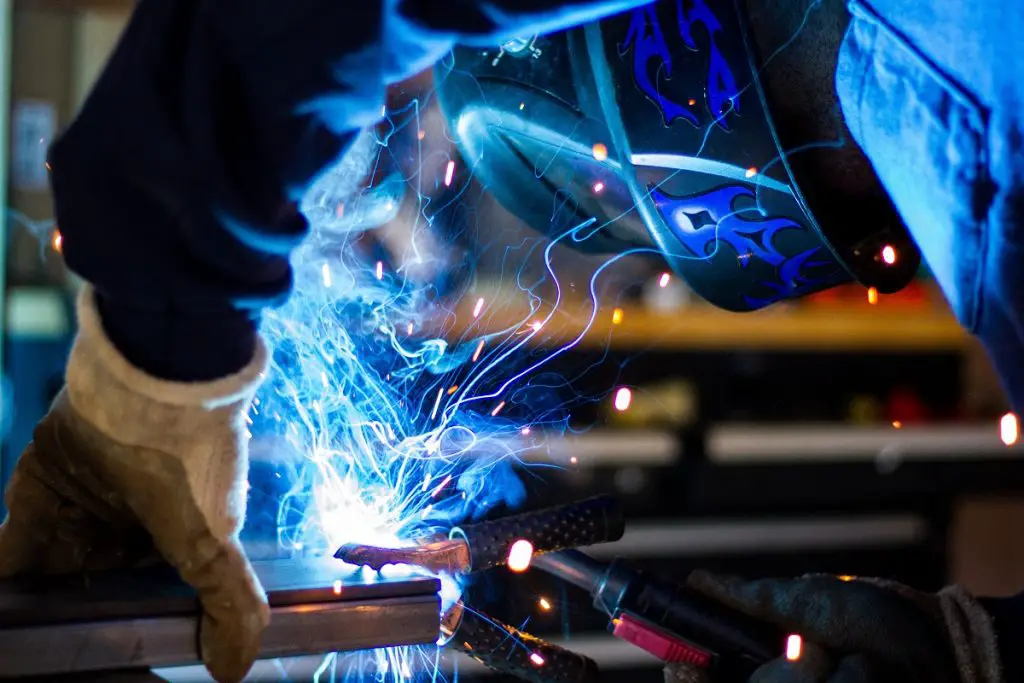
First Beginner Welding Project: The Bowl
The bowl is really an excellent beginner’s project for several reasons. It teaches you these basic skills:
- Safety
- Proper body placement to a stagnant project
- Proper handling and using a MIG gun
- Supporting your hand using a workbench
- Viewing a project through a hood for the first time
- cleaning and prepping your materials
- laying out your project.
- Use of wire snips.
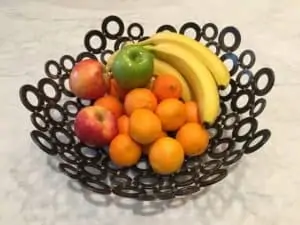
When you’re done, you’ll have a great-looking bowl, like this:
Equipment Required
- MIG Welding Machine
- Safety gloves
- Welding Hood
- Wire snips
- Metal washers of mild steel of different sizes. I’ve used two sizes in the past for best results.
- A steel mixing bowl
- A welding table
1. Plan your workload out
Even before you grab your welder, you want to take your washers and lay them out.
When you unpack your washers you’ll want to wipe each one down with denatured alcohol. The DNA (Denatured Alcohol) clears away all the dirt, dust and grease off the surface of your metal and you will have a good, clean weld.
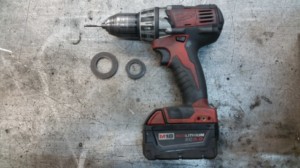
I have two sizes for my bowl.
2. Arrange washers inside a mixing bowl
Once you prep your metal grab your mixing bowl and arrange your washers inside the bowl.
Like this:
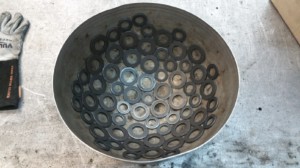
Make sure they are laying flat on the sides. Your washers will sit on top of each other without collapsing.
NOTE: The idea is to get a pattern with the two sizes that you like.
3. Prepare your Equipment and Protection
Once you’ve got an arrangement you like, you can go ahead and suit up!
Get your hood, jacket, and gloves on.
4. Start Welding
Make sure you set the ground clamp to your workbench and you’re ready to begin.
The great part about this project is that every washer you are going to connect will be with a tack weld. Many people confuse tack welds and spot welds – I did for a good year!
So here is a good way to remember them. A good way to start is Top Down.
Like this:
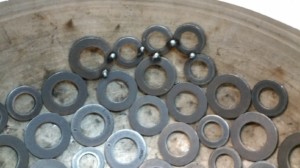
Why?
Because welding metal, in general, makes the metals pull together so as you tack weld your washers they will want to pull off the wall of the mixing bowl. As you weld, you can gently push them back against the mixing bowl which will maintain the shape of your project,
If you work bottom-up you run the risk of the top collapsing and falling down so you’ll have to set up all your rings again.
In Conclusion
Tack weld the first row (working in a circle). Left to right or right to left – there is no wrong way here. Focus on creating nice tack welds to hold your rings together.
That is the entire process!
It’s great because you have all the time you want to focus on nice tack welds.
Now, this is a pretty simple project, and that’s good. Your new bowl should look something like this:
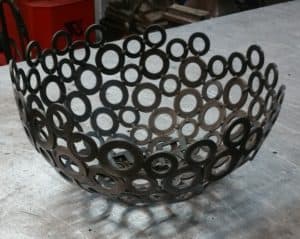
You want to make sure you are doing everything correctly and with full understanding.
So after a few hours, you’re going to be tired. This small project is perfect for your first time on the floor.
Now, another important piece of this project is: It’s fully complete in one session. When you’re done – you have a great-looking bowl.
You’ll be proud to put it on your table and show off your new skills. These small wins are important when building a new skill set.
When you have a visual reminder in your daily space it does three things:
- It demonstrates your commitment to your new skillset.
- It reminds you to practice.
- It shows that yes, you can weld!
Skills you are using in this project
The bowl helps you focus on two key skill sets :
- Your body posture and vision ( how you stand holding your MIG gun and see through your hood)
- Completing your tack welds
Body Posture
Let’s talk about body positioning in relation to a workpiece. Since everyone is built a little different let’s focus on the welder itself.
- You want to position the tip of the MIG gun anywhere from ¼ to ¾ from the workpiece.
- You want to hold your gun at 90 degrees to your workpiece. At this distance, you are going to make a short circle to complete your tack weld and you are going to be listening for that short “bacon” sizzle.
- Get comfortable while welding – Fatigue leads to injury. You do not want to unnecessarily fatigue your hands, shoulders or any part of your body. Use two hands to support your MIG gun and have yourself positioned in front of your weld. It might take some time to get comfortable with your positioning to your work and that’s ok. It’s part of the process.
Now that we talked about being comfortable, let’s look at this project for the short tack welds and your hood. As a new welder, it will take some time to get used to the auto-dark features of your hood and focus on your weld.
The short tack welds will get you used to the hood going dark and light quickly.
Why are Tack Welds important?
The basic idea of a tack weld is to hold two pieces of metal in place until you can bead weld it. You are heating the metal and add filler to a specific point. When you tack the piece together your basically setting yourself up to bead weld.
Now when working on a larger project tack welds hold your project together before final assembly.
So good tack welds will be strong enough to support the project but it will also be easy enough to break!
If the alignment, angle, or position of your metal is off you can easily remove the tack weld and reposition the metal for another tack.
Another way to think of tack welds is like building blocks. They are the basic weld before beads.
So before learning how to properly bead weld, learning how to tack weld is the first important step.
Safety
A lot of folks want to jump right into welding and that’s great. I can’t think of an industry that’s as fun and rewarding as metalworking. So making sure you have the right gear will keep you welding for a long time. Read my post about protective equipment for welders.
Let’s talk about each piece.
- A good pair of MIG gloves will save your hands from spatter. They are cost-effective, durable and will ensure your hands are protected yet flexible enough to hold the MIG gun and handle your project and tools.
- You’ll also need a good welding hood. Welding emits a UV light can permanently damage your eyes. This is one area that you need to purchase a quality one and they don’t have to be expensive to be good.
- You’ll need a jacket and safety glasses too.
A good choice for a jacket is the BSX entry-level jacket. It’s 100% cotton, easily washable, and will protect you from spatter and slag.
Regarding safety glasses, A good entry-level pair will do just fine and pick up two or three. Once they get scratched, they are no good.
Second Welding Project for Beginners: The Cube
Moving forward, let’s jump into the next project. This project can definitely work for a beginner. However, I like this as my second project.
It builds on all the skills we practiced for the bowl.
In this project you’ll be:
- standing longer
- tack welding
- Bead welding
- fitting together and clamping your pieces
- grinding down your welds…
If your ready for The Cube, let’s dive in!
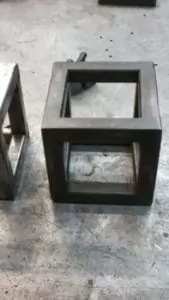
Materials and Equipment
- 8 gauge ½ tube – you’ll need about 9 feet
- A band saw or a Sawzall or, the most basic: a hacksaw.
- A vice
- A belt sander or an angle grinder with 36 grit paper or a cutting stone
- Small shop magnets
- Ball peen hammer or a lightweight hammer
- Clamps, minimum of 2
- Welder
- Your safety equipment.
Now, let’s plan out your workload on this project. Once you’ve purchased your 8 gauge metal you’ll want to draw some rough blueprints.
1. Cut your metal
You’ll be cutting (4) 4” posts ( straight cuts) and (8) 45-degree miter cuts @ 6 inches.
So you’ll end up with parts that look like this:
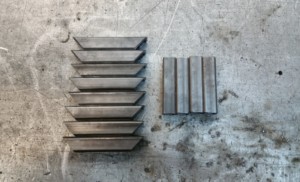
2. Bevel your cut parts
Now you’ll want to bevel the edges on your material. You’ll take your post and bevel two joining sides.
Something like this:
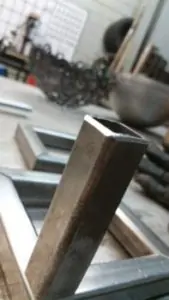
and you’ll bevel the opposite corners on your miter cuts:
Like this :
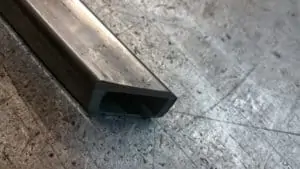
Why exactly do you need to bevel edges before welding?
You want to create a groove for your weld to sit in. So once you tack your piece together, you’ll have a channel for your bead to sit in nicely.
4. Clean your parts
After you cut your material you’ll want to clean them with Denatured alcohol. It is used to clean the dust, dirt, and mill scale off your material. When you have any impurities on your metal it could compromise your weld and we don’t want that.
So clean metal is the way to go. You’ll have the best chance at creating a nice solid weld.
Once you have all your parts together, you can lay them on your work table.
5. Tack Weld
Firstly we are going to tack weld the two miter cuts.
You want to grab (2) 45-degree pieces and join them together like so:
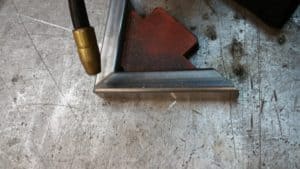
Make sure they are joined with a magnet.
Now, you’ll want to tack weld then end furthest from the magnet. They can affect your arc, so you’ll remove it after your first tack weld.
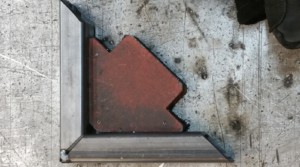
Now, you’ll drop another tack weld on the other side of your joint.
Like this :
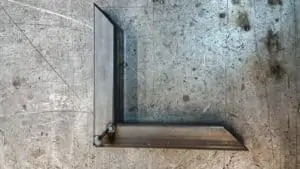
Once complete you can place your newly joined angle aside.
Let’s repeat this process three more times.
6. Join corners together
The next step will be to join our corners together. We will grab our magnet again and use it to join our parts into a square.
Like this :
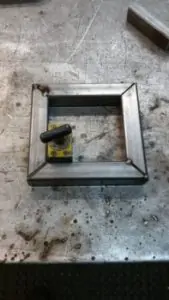
Again, we will be using tack welds for all of this. Once complete we will lay some beads to tie it all together.
When we have one square repeated we can repeat this process. When we are done, we should have our cube’s two sides (top and bottom) complete. It should feel good to see our cube coming together at this point!
7. Attaching posts on completed sides
Let’s move on to the next stage of assembly. We will grab one of our completed sides and rest a post on the corner, like this:
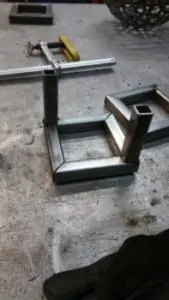
A magnet will be helpful for alignment.
NOTE: Make sure to align the post with the outer plane of our cube So it will be flush.
Once you feel comfortable with the position, you’ll tack weld the post in two locations. Repeat this process on the opposite corner of your side.
When complete you’ll have all four posts welded. Two on each side of our cube.
The reason for this is so we can fit our cube together easily.
8. Use Clamps to tighten down cube
Well, our cube will not sit together perfectly when we test fit it.
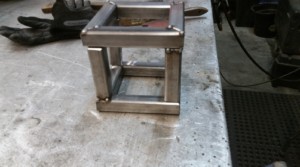
So we will have to use our clamps and we can tighten down our cube as necessary.
I placed a clamp on the above cube on the left side to get the post nice and tight to the top of our cube.
If you still need to do some adjustments to the posts then don’t be afraid to tap your posts with the hammer.
REMEMBER: we tack welded this so that we can make these adjustments.
If we laid a bead down right away we would not be able to fit this together.
9. Bead Welding
Once you’re satisfied with the fit…
You guessed it.
Time to tack your posts down so you have a solid cube. When you’re done you can remove your clamp.
You’ll have a cube that looks like this :
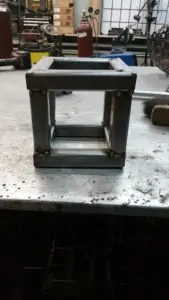
Looking good so far!
Let’s talk about finishing up our welding on this Cube!
If you’ve built the first project with me, the bowl, and now your completing the cube, this will be your first time welding beads and that’s exciting!
Remember your hand positioning and your MIG gun position and listen for that bacon sound! If you placed your tack welds at the ends of your pieces you’ll have a good starting and ending position for your welds. Now it’s a matter of running a bead from tack to tack to complete the joint.
You’ll repeat the process for each joint you have and don’t worry about the inside joints. if you remember, we didn’t create a channel for them – so no need to weld them.
When you are done, your Cube should look like this :
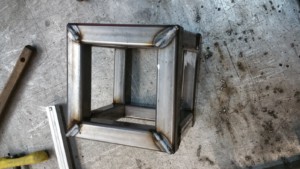
10. Grinding
Once you’ve cleaned your workspace, it’s time to finish your cube. The first step will be to secure your cube to your work table.
Safety first!
You’ll be using an angle grinder to knock down your welds. And these can be super dangerous so be sure to use both hands on your angle grinder and wear your safety glasses.
An as always, make sure you are in a comfortable position. I like using the Dewalt angle grinder because it has a deadman switch for extra safety and no lock to keep the angle grinder automatically engaged.
Once your cube is clamped down, you can begin to knock down your welds. The best way I found to use the angle grinder is :
Your right hand will apply the pressure and your left hand will provide direction. With a few passes of the angle grinder, your joint should look like a solid piece of steel.
Like this:
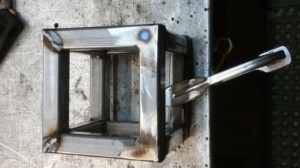
What you’ll do next is repeat this process for each weld you created.
In the end, you’ll have a cube that looks like this:
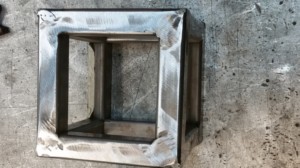
And this would be a great place to End your first project.
TIP: I would spray the entire work with a light coat of clear coat - just to prevent rust.
11. Optional step before clear coating – Sanding
You can use an orbital sander and some 40 grit paper to go over your welds. After you run a 40 grit pad over the entire cube I would then run an 80 or 100 grit Pad over the cube one more time.
That would really give it a nice rough finish. It would be perfect at this point for a clear coating or a patina and wax treatment.
Either way, when you finish your cube you’ll have a great project you just completed.
This project is great because you’ll really get comfortable welding here. You will have practiced cutting down stock and fitting it together with laying tack and bead weld.
You’ll also see how the heat can pull and warp the metal and how to fix it.
Conclusion
Both of these projects: The Bowl and The Cube are great beginner’s welding projects.
I like them and use them for my new welders because they really get you comfortable not only on the fabrication floor but actually welding.
The Bowl gives you the confidence of laying good tack welds, body positioning, and welding through a hood for the first time. Best of all you will complete the bowl in under two hours.
The Cube is excellent because you built on the welding skills set. It should take you about 4 hours to complete the cube and you’ll be laying tacks, laying beads, fitting together joints, and how to grind down your welds.
With the skills, you learn on these small projects you’ll be able to tackle larger, more complicated projects in a short period of time.
Read Next
- Which welding Method and Metal is Best for beginner artists?
- What do I need to start welding?
- 8 Tips for MIG Welding Beginners
- Why Use a Welding Apron?
- A Beginners Guide to Welding Chromoly
- How to select Welding Amperage?
- 5 Beginner Welding Mistakes
- Differences Between Welding Brazing and Soldering
- A Welding Guide for Beginners
- A Beginners Guide to Welding Aluminum
- 101 Welding Tips
