Table of Contents
1. Try a Pancake Hood
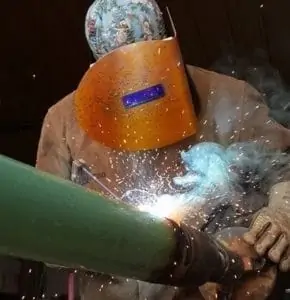
If you have never used a pancake hood before, you should give one a try. Made popular by pipeline welders and other industrial welders who do a lot of welding outdoors, the pancake hood might be your favorite once you’ve tried one.
Read my post, What is a Pancake Hood? for more information.
2. Keep your Welding Rods Dry
Rods that have soaked up moisture from the surrounding air will weld very poorly. Damp rods may cause the arc to be rough and erratic. If you have the correct polarity and are welding in the recommended amperage range for the rod you are using and your rod is not burning smooth and consistent, your rods may be damp. To remedy this problem always store rods in a sealed container when not in use. Discard electrodes if the flux becomes flakey and separates from the steel easily.
Many welders will store their rods in an old discarded refrigerator. This aids in keeping moisture away from electrodes. It is also handy to store anything else you may want to keep dry and dust free. If you have no dry rods to finish your job with, try sticking the rod to the base metal for just a couple of seconds. This will cause the rod to heat up very quickly and the heat may help evaporate the moisture held in the flux. The rod will become red hot in just a few seconds. For that reason, do this only as a last result and with caution.
3. Keep your Project from Sticking to the Welding Table
Grounding directly to your work is the most obvious remedy. If your projects are too small to clamp to, a small copper wire from the ground to the workpiece should do the trick. A thin sheet of copper or aluminum on your tabletop will also keep the project from arcing between the table and the workpiece causing it to stick.
4. Keep Sheet Metal from Warping
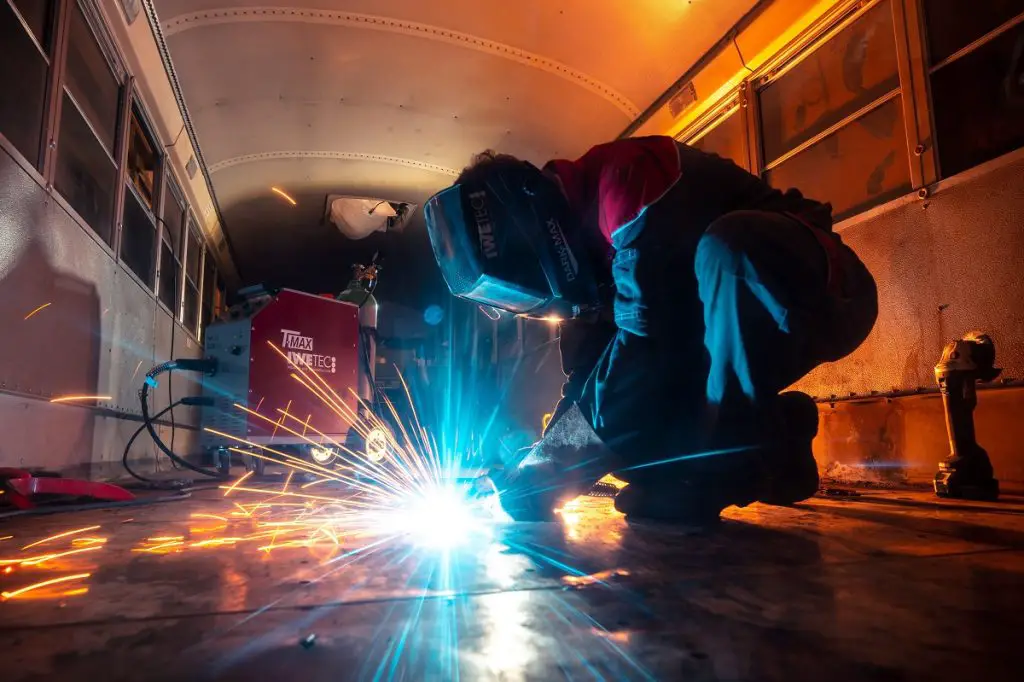
When welding larger sheets of steel such as a floor for a trailer, weld a short bead before moving to the opposite side of the sheet to do the same. Keep moving around the piece making short welds and taking periodic breaks to allow some heat to dissipate before welding again. Do this until you have a complete weld all the way around. It is time-consuming but the finished product will be worth the trouble.
5. Always Use Face Shields
At least one is an absolute must to have in your welding area. Having multiple face shields nearby means you will be more apt to locate and therefore wear one when needed. Always wear safety glasses under your face shield when grinding, buffing with a wire wheel or flap disc or cutting with a chop saw.
See my Uvex Bionic Faceshield Review.
6. Use Goggles when Appropriate
Welding and cutting goggles will protect your eyes from harmful UV rays. The dark lenses will filter out much of the brightness allowing you to see what you are doing better.
7. Safety Glasses are Important
Wearing safety glasses when tools are sending particles airborne is a must. Always wear safety glasses in conjunction with face shields for additional eye protection. Always make sure your safety glasses are able to filter unwanted UV rays as well.
8. Know the Fundamentals of Welding
The process of welding is simple. It consists of heating two pieces of metal to the point at which they melt. The molten liquids then combine in the weld pool and will become one when the molten metals solidify. A third source of metal also known as filler is usually introduced and melted together with the two base metals to add to the total mass of the weld.
These filler metals will either be electrodes, filler rods, or continuously fed wire depending on the welding process chosen. Done correctly, a weld will have no imperfections such as pinholes and will tie in nicely with the base metals on its outer edges. A good weld will also have penetrated through to the bottom of the base metals and completely fused them together.
9. Welding Sleeves protect your arms
Sleeves are very popular due their portability and ease of putting on and taking off. They shield the arms from heat, welding spatter and cutting sparks. They also take up less room in your welding bag than a heavy shirt will. Welding sleeves are typically +/- 21 inches long and made from 100% flame resistant material. If you’ve been walking around looking like a heroin addict due to the burns on your arms, you need a pair of these!
10. Steel Horseshoes Make for Great Art
Horseshoes are great for making just about anything while simultaneously providing western flair. You can buy them new or find them used on farms and ranches where multiple horses are boarded. Ferriers can be great contacts for finding good deals on used horseshoes.
11. Try a Circle Cutting Guide
For perfect circles, every time, use this with your plasma cutter to cut circles up to 20″ in diameter.
12. Extreme Gear Packs for Neatness and Portability
Revco makes an extreme gear backpack which is great for keeping all your welding gear in one, convenient place. Even if it never leaves the shop, having a gear bag to store all of your most needed tools and accessories in can save you a lot of frustration when it’s time to start your next project.
Additionally, the black flame retardant material with red piping looks sharp and is ready to go when you are. Most noteworthy, it has a sleeve to keep your welding helmet dust free. There is plenty of room for your gloves, jacket, grinder, tools and more!
13. Saddle Cutting Templates are Awesome
Accurately mark your pipe for cutting saddles with a steel wrap around cutting guide. They also have grooves for marking 22, 45 and 90-degree cuts. These guides take all the guesswork out of cutting the most commonly used angles for pipe. They are simple to use and durably constructed for many years of service.
14. Magnetic Welding Holders keep Everything at the Right Angle
These handy devices are used to hold your project pieces in place at the desired angles of either 45, 90 or 135-degrees until tacked or welded. In addition, the holders are magnetic and built to last. They come in several sizes and are designed to free up your hands so your work can be done more efficiently and safely.
15. Felt Welding Blankets keep burns off the Good Stuff
These are perfect for covering anything that might get damaged from cutting, welding, or grinding sparks. The 3′ x 6′ blanket is large enough to protect most items near the project being worked on. The blankets are soft, pliable and heat resistant up to 1800 degrees F. They roll up for easy storage when not in use and come in several, larger sizes.
16. Victor Med Duty Cutting Torch is the Perfect Size for most Shop Welders
Victor has a long-established reputation for manufacturing quality equipment. Their medium duty torch kit comes with everything needed to heat, cut and Oxy/gas weld. In the box, you’ll get a cutting tip, welding nozzle, heating nozzle (small rosebud), regulators, hose, striker, tip cleaner, torch handle with built-in flashback arrestors and check valves; CA 1350 cutting attachment and soft-sided goggles with a shade 5 lens. Just hook up to your preferred sized bottles and start cutting steel with fire!
17. Magnetic Cutting Guides make for Straight, Smooth Cuts
This 24″ Magnetic Cutting Guide is designed to help the user cut straight lines quickly and easily. The two 30lb pull magnets securely hold the guide in place while you drag your cutting tip alongside for perfect straight line cuts. You will save so much time with this tool. No need to mark the metal or straighten up the edges with a grinder after the cut.
18. A Cutting Torch Guide Tool works great with the Magnetic Cutting Guide
This product is designed for a cutting torch and meant to run alongside a straightedge for cutting precise, straight lines. The standoff distance is adjustable. The guide will also keep the tip in the verticle position during the cutting process. This means less slag to clean after the cut.
19. Circle Cutting Stencils for Cutting Perfect, Small Circles
For quick and accurate circle cutting. A 5 piece stencil kit includes 10 hole sizes: 1/2″, 5/8″, 3/4″, 1″, 1 1/4″, 1 1/2″, 1 3/4″, 2″, 2 1/2″, 3″. The outside radius acts as bonus circle guides and a straight edge. A laser has etched each stencil identifying each size plus centerline marks.
20. Extension Cords Increase Machine Portability
Every MIG and TIG welder on a cart needs a longer cord to take advantage of its portability. Get a NEMA and STA certified cord that remains flexible at temperatures below freezing. Lighted ends make utilization at night much easier.
21. Turn your Angle Grinder into Chop Saw
An angle grinder holder will effectively turn your angle grinder into a small chop saw. Now your angle grinder is more versatile than ever. This universal tool is designed to work with most 4 1/2″ and 5″ grinders.
22. Welding for Dummies is a Great Resource Book
I’ve always thought that if by reading a new book, even if I walk away even with only one new idea, then it was worth it! Here is another well-written guidebook from the Dummies Series. This book takes you from evaluating the material you’ll be working on through the step-by-step welding process.
Plus, you’ll get guidance on how to follow safety procedures. The easy-to-understand information in Welding For Dummies is a great resource for learning and mastering welding skills.
23. Be able to See what you are Welding
If you are using a welding mask or helmet with dirty or scratched lenses it is probably time to replace them. If you will keep an extra set of replacement lenses on hand, you are more likely to replace defective lenses when it is time. But, if you are like me and don’t keep a spare set of lenses, we are more apt to think we can do just one more job with these old second-rate lenses and then swear we’ll pick up a new set later. Then, we tend to put the helmet up when finished and forget about it until the next welding project. It may be time to upgrade your welding helmet altogether.
Did you start out with a cheap one or maybe an older style? If so, you really need to experience a quality helmet with a larger viewing area, auto darkening, with an adjustable shade feature. If your eyesight isn’t what it used to be, make sure your helmet will accommodate a magnifying lens. Don’t let your welding experience or the quality of your welds suffer because you can’t see the weld pool well enough.
24. Know your Welding Machine
If your machine is an AC only welder then you have no other polarity choices. If you have an AC/DC welder then familiarize yourself with the pros and cons of each setting. With direct current, a.k.a. DC, you can opt to weld with either straight polarity or reverse polarity. This means that the electrons in the current will only flow in one direction.
Never both ways simultaneously like with alternating current, a.k.a. AC. So, with three polarity choices, which one will be the best for the job in front of you? Note: AC current is really not a polarity as the current itself reverses polarity 60 times per second – 60 hertz
25. Know when AC Current is the Best Choice
Again, if AC is your only choice just be sure you are using rods made specifically for AC welding. If you have a choice between AC and DC, you may choose to only use the AC setting when welding on magnetized metal. A good example of magnetized metal is tubing and rods that have been in a rod pumped water or oil well.
The friction between the rods and tubing as the rods cycle up and down several times a minute will quickly magnetize the steel. Once the metal liquefies in the welding pool, magnetized steel has a tendency to blow or push the molten metal away from the pool. This is better controlled when welding with AC. Otherwise, most welders with the option will perform 90% or more of their work welding with DC. It is easier to start the arc, keep the arc going, it welds smoother, and is more consistent, and splatters less.
26. Know which DC Polarity is Best and Why
Since the current flow is either one direction or the other depending on the DC setting, it is fairly easy to understand what is actually happening when welding. What might be a little confusing for some is the industry uses two different sets of terms to describe the two settings. Straight and Reversed is one way to distinguish the polarity. The other is Positive and Negative polarity. The latter description may be the less intuitive of the two.
Straight and Positive are describing the same polarity direction, as is Reversed and Negative. Since most DC machine dials are typically marked with the + and – symbols, we’ll stick with the terms positive and negative to define the settings as we continue.
Most people will do the majority of their welding on DC+. This means the current flows from the machine to the base metal then up to the electrode and back to the machine to complete the circuit. The consequence of the current flowing through the base metal first is that an estimated 65-70% of the heat generated will be created in the base metal. This helps to gain more penetration.Conversely, when the current is reversed to the DC- setting, the current will flow from the machine through the electrode to the base metal and back to the machine to complete the circuit. With this setting, the electrode will receive more of the heat this time. This results in less penetration. It also makes the electrode burn off at a higher rate creating more deposition, making welding thinner metals easier with less burn-through.
27. Know which Amp/Current Setting is Best for your Electrode
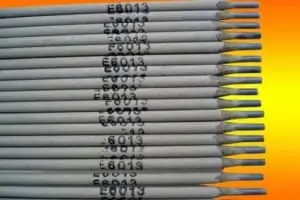
There are more 1/8” welding rods sold than any other size. So. Let’s use this rod size for our example in finding the best starting point for our amperage setting. If the rods do not specify, the rule of thumb is one amp per .001 in rod diameter. A 1/8” rod is .125 inches in diameter. Therefore, a good amp setting to start with is 125 amps. Make adjustments in 5-10 amp increments until the desired setting is found.
28. Know the Correct Arc Length
The arc length is the distance between the rod tip and the pool when welding. Again, using a 1/8” rod for our example, the rule of thumb suggests keeping the arc length at 1/8”, the same distance as the rod diameter. Keep in mind, the rod diameter is the diameter of the steel portion, less the flux. If the arc length is too short, the rod is going to tend to weld poorly and stick more often. If too long, you will create more splatter and get less deposition to the weld.
29. Know the Correct Rod Angle
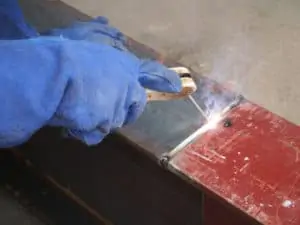
For welding in the flat or overhead position hold the rod at approximately a ten-degree angle with the top of the rod leaning towards the direction of the weld. This is also known as the drag or backhand technique. When welding vertically and uphill, tilt the rod the same ten degrees but in the opposite direction of the direction of travel. This method is known as the forehand or pushing method. To estimate the ten-degree angle, picture a straw laying to the side of your glass of tea and that should be close to +/- ten degrees of angle.
30. Know the Best Ways to Maneuver the Rod Tip
There are several different ways a welder might maneuver the rod tip and therefore the pool during the welding process. For ¼” thick metal or less, a steady drag with no lateral motion imparted on the tip is probably best. Using a half moon or L shape motion when making a T weld, may be helpful at times. This would be to maneuver the rod up, on the vertical portion while pulling the puddle slightly forward as you work the rod tip down to the horizontal piece. Then, working the tip slightly up and back then down and forward. This would only be necessary when welding thicker metals.
Be careful not to undercut the base metals. On thicker, flat metal, to make the weld slightly wider some will simply make a Z pattern or a semi-circle pattern with the rod tip. Another method is the hesitate and drag technique keeping the rod tip in line with the weld with no lateral movement whatsoever.
31. Pay Attention to How Fast you are Welding
Travel speed is very important. Travelling too fast will result in poor penetration and the possible formation of pinholes or porosity. The bead will also be too narrow, the deposition will be inadequate and the base metals will often be undercut. Overlap or what is also known as cold lap happens as the result of moving too slow. This forms as the result of excessive deposition and lack of penetration. The weld appears to sit on top of the base metal instead of becoming part of it. In other words, the tie-in on the edges of the weld may not be smooth and uniform.
32. Clean the Base Metals Prior to Welding
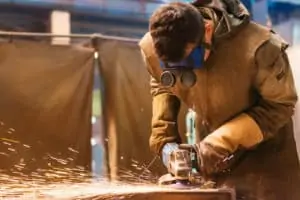
To help ensure that there will be no porosity in your weld, thoroughly clean all mill scale, rust, dirt, moisture, grease, and oil from the surface to be welded. This can be accomplished with a wire wheel, flap wheel, or grinding wheel on an angle grinder. If it’s not too bad, a wire brush my get the job done. If for some reason you are not able to clean the metal, be sure to use E6011 rods. When welding on less than clean base metals slow down your welding speed and slightly increase the pool size which will allow more time for any additional gas bubbles to migrate out.
33. Perform a Dry Run
It can be very helpful to perform a dry run with your electrode before you actually start welding. Especially, if the weld is going to be in a tight area. With the power off, practice where your hands will need to go and if there will be vision obstacles as you move around the proposed weld. Identify the areas where you may be welding out of position and may have issues keeping the proper rod angle. You may find it best to stop your weld in strategic areas in order to reposition yourself in a manner more conducive to maintaining proper sight and technique. It will be better to identify these spots ahead of time. Before you get to them during the actual welding phase.
34. Have Fun Welding
Take pride in your work. Things built out of steel will be around for a long time. Be able to step back, admire your work and take pride in the fact that you have built something that is going to be around for a long time for others to admire.
35. Portable Torch Kits come in Handy
A small portable torch kit with bottles comes in handy when larger bottles are too much trouble to load up and move. The portable kits are great for smaller cutting and gas welding jobs away from the shop. Kits can also come in handy for helping thaw frozen pipes as well.
36. Decide which Welding Method to Learn First
It’s a personal preference but I believe learning to arc weld with an electrode is a great place to start. One thing you need to consider, however, is what kind of projects you plan to work on. Keep in mind, there is no single method of welding that is best for all applications.
Considering the top three methods, there is some crossover between them, but there are also specific things that each one does better than the other two. For instance, TIG welding is the choice for welding Chromoly, brass, copper, magnesium and titanium. The welding of aluminum requires either the MIG or TIG method. But, you will need a stick welder to weld cast iron. You can pick from all three methods if you choose to weld steel or stainless steel. Just bear in mind that it will take you considerably longer to weld steel with a TIG welder than a MIG or stick welder. And, if you are welding outside or in drafty areas you won’t want to MIG weld steel unless you switch over to a flux-core wire first.
Don’t be intimidated by the choices as hobby welders work with steel almost exclusively. Thus, narrowing down your choice of welding methods to the Electrode or MIG methods. If you plan on welding up to 1/4″ to 5/16″ thick metals outside or in the barn with the doors open at the farm or ranch, you will probably be happier stick welding. If you are working with thinner steel and will be indoors with almost no breeze to speak of, then you will probably want to learn to MIG weld first.
37. Protect your Eyes
Never look directly at the welding arc, even for a split second without a welding helmet. Even as a bystander, indirect exposure to the welding arc can also damage your eyes. A quality welding helmet is a must. No matter if you plan on observing a welding instructor, friend or mentor, it is a good idea to have your own welding helmet.
Don’t get discouraged by the assortment and price ranges available. Start with a good auto darkening helmet with an adjustable shade feature. A good one can be had without breaking the bank. Having said that, your eyes are one of the most treasured pieces of equipment you own. If taken care of, a new helmet should last many years. Read, “Will welding damage my eyes,” here.
38. Try a Helmet with an Adjustable Shade Feature
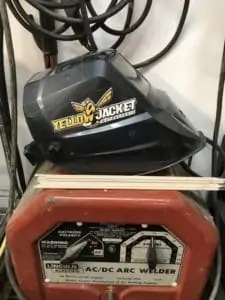
Your experience will be enhanced with the adjustable shade feature. A great way to familiarize yourself with its effectiveness is to watch someone else weld. This gives you the opportunity to adjust the shade on your helmet under fire without being distracted.
Your weld quality should improve quicker by having the ability to see what you are doing with more clarity. You don’t want the adjustment to be too light to the point the arc blinds you. On the other hand, too dark and you won’t be able to see where you are going with the weld.
39. Locate a Welding Mentor
If available, plan on taking welding courses. If that is not an option for you, a good mentor could prove invaluable. That could be a friend or acquaintance with experience in the type of welding you would like to learn first. Being able to interact with another individual by asking questions specific to your understanding, will help you learn much quicker.
40. Practice, practice, practice
Spend some time in the beginning simply laying beads on top of a single piece of thicker steel. Concentrate on the pool, which is the small molten pool of metal at the base of the arc. Generally speaking, the pool should be fairly round. Welding is all about the pool and how it is formed and maintained by the welder. Stacking dimes is a term coined to describe a good weld.
Imagine a dime laid on its side at a very slight angle with the trailing edge slightly elevated. Now imagine that same dime with half its mass below the surface of the metal being welded and the other half above the base metal. Now imagine a string of dimes overlapping each other for the length of the weld. If done at the correct amperage, speed and arc length you will have stacked some dimes.If the bead is narrow and appears to be laying on top of the base metal instead of being part of it, the current is either too low or you are welding too fast. Conversely, if the bead is more oblong to teardrop shaped with the point of the teardrop at the trailing edge you may be welding too slow or the voltage may be too high.
41. Set Yourself up for Success
Depending on the size and scope of your project, you may find yourself welding out of position at least some of time. But, in the beginning, set up a small welding area, preferably a metal table or something similar. Sit in front of your base metal with it laying flat on the table. From a comfortable position get good at creating good beads, consistently. Once you have increased weld quality and feel you are ready, butt two pieces of metal together edge to edge leaving a slight gap between them and practice welding them together.
Next, set up a tee joint. Have one piece of metal laying flat on the table with the other sitting perpendicular to it so that you have formed an upside-down T. Weld the two base metals together where they meet up. Another common joint is the lap joint. You can practice this by laying two pieces of steel on top of each other and sliding the top piece slightly to one side. Weld them together at the point where the edge of the top piece runs along the bottom piece. When you get good welding these three types of joints, you are on your way to becoming a welder.
42. Protect Yourself from Injury
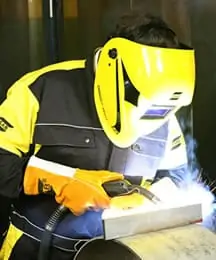
UV rays thrown off from the arc will burn all exposed skin in close proximity. Make sure your neckline and upper arms are not exposed. The resulting burn is much like a very bad sunburn. Glowing red hot sparks and molten metal falling from the welding area will do a number on your skin and clothing not designed to handle it. If you have ever had a hot spark land on your tennis shoe and burn through it as well as your toenail below, well… you get the idea. In addition to your leather welding gloves, wear long-sleeved, heavy cotton, button-down shirts, and blue jeans at a minimum. I recommend FR or flame resistant clothing.
43. About MIG Welding
MIG welders have surpassed stick welders to become the most common machines purchased for industrial work. The continuous wire feed eliminates the need to stop work to discard and replace a used up electrode. The inert gas shield of MIG welding performs the same duty as the solid flux coating on the rods used in electrode welding. Both are used to shield the molten pool from contamination. Contamination that may lead to pinholes a.k.a. porosity, brittle welds and other issues.
A finished MIG weld will not have slag covering it. Therefore, saving you time by not having to buff slag off to inspect the quality of the weld. Performing MIG welding indoors away from wind and large fans is best. The shield gas blowing directly onto the weld will easily get blown away when wind currents are present. It needs to shield the weld from atmospheric gases and otherwise perform its duties. Be that as it may, the wire machine does have some flexibility. One can change to flux core wire on most machines, replacing the need for shield gas. The flux core wire will allow you to weld outside in windy conditions but will deposit flux on the weld. When it comes to price, MIG welders are typically more expensive than stick welders.
44. Beginner Welding
The art of welding has been around since the middle ages. Through its evolution, welding has been refined to the point that just about anyone can learn the basics. And, within a short amount of time, the new welder can be handling small to medium sized projects. Having said that, it will take time to gain the knowledge and obtain enough practice to procure the necessary skill to tackle more complex jobs. Jobs that require a high level of structural integrity for instance.
45. Projects vs Machine Types
You will need to ask yourself if the majority of your projects will take place indoors, outdoors or a combination of both. If you think you will be welding outdoors a good portion of the time, stick welding may be the right choice for you. Learning to weld with an electrode or rod has other benefits as well. Learning the basics of stick welding will probably help you learn MIG and TIG faster if you intend to increase your welding prowess at a later time. You will also be able to securely weld much heavier materials with a stick welder. And, a variety of rods can be purchased for different circumstances. Thus, providing a greater range of confidence in weld strength and quality.
If you decide that you will always be working indoors on lighter, thinner projects and like the simplicity of MIG welding, then this could be the best route for you to take. You may find the learning curve to be shallower with MIG, compared to stick welding.
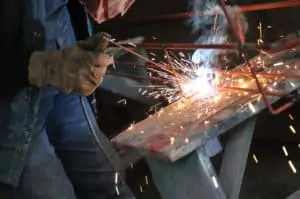
46. Buying an AC Stick Welder
Beginning welders may be tempted to purchase an AC only machine to start out with. They are cheaper and if you decide you don’t enjoy welding much, you are not out very much money. The quality of the welds can be very good. Good enough that for most jobs, an AC machine will do just fine. And, it will hurt less seeing it sit over in the corner of the garage not being used if that is the life your machine ends up being relegated to.
When welding AC, remember that you must use rods strictly made for AC welding. With alternating current or AC for short, the current flows back and forth, switching polarity sixty times per second – (60 Hertz). A noticeable buzzing sound can be heard during the welding process which is absent when welding with DC. There are a few people who actually choose to do all their welding with AC.
47. Welding Helmets
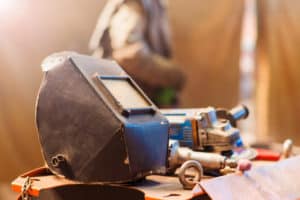
The first time I struck an arc over forty years ago, I used a flip helmet that had a fixed filter lens. I graduated from that helmet to one with a fixed filter lens that would flip up and down. That seemed like a great improvement at the time. If you needed your off hand to hold something in place you could do the old head nod to flip the whole helmet down into welding position. If your off hand was free you could use it to flip the filtered lens up and down instead.
Today, the choices of helmet styles seem endless. The self-darkening lenses changed the welding world when they first hit the market. And, the self-darkening lenses keep getting bigger and bigger. Being able to see a larger portion of the work area before and after striking the arc helps tremendously. Especially, if you find yourself welding out of position a lot of the time.
The adjustable shade range lenses were an awesome upgrade as well. With this feature, the welder can fine-tune the auto-darkening lens to match the brightness of the arc. This is often different for each individual due to the sensitivity of his or her own eyes. You now have the ability to quickly find the most advantageous filter level allowing you to see what you are doing with less eye strain. These helmets are now priced so that it makes very little sense not to buy one with both self-darkening and adjustable shade functionality. Your eyes and your welds will thank you for it!
48. Welding Gloves
There is no need to get exotic in your choice of glove leathers if you are just starting out. Unless you have very large or very small hands, a large fourteen-inch glove should be adequate. Look for a glove with kevlar stitching made with cowhide and lined with a cotton liner. There should be several options depending on where you shop. Cowhide can be readily dyed with just about any bright color and while new, they are pleasing to the eye. But don’t get too caught up on color because if you do much work with them at all, they won’t stay pretty for long.
49. Welding PPE
There are three things the welding process produces that we need to protect against. We need to protect ourselves from hot sparks, UV rays, and hot metal. Our welding helmet is going to protect our eyes and face from UV rays and hot sparks. Our 14″ welding gloves are going to protect our hands and most of our forearms from UV rays, hot sparks, and hot metal.
The UV rays produced by the welding arc can leave severe burns similar to sunburns on all other exposed skin. Since we have our eyes, hands, and lower forearms covered already we need to make sure our upper forearms and chest are taken care of. For many, the most practical upper body clothing is a cotton t-shirt covered by a long sleeved, flame resistant welding shirt or jacket. The cotton undershirt will help protect your upper chest from the direct UV rays, be a second layer of protection from hot sparks, and help wick up perspiration on hot days.
50. About Hearing Protection
Always wear hearing protection when grinding and using a chop saw. If the noise hurts your ears, the noise is probably damaging your hearing!
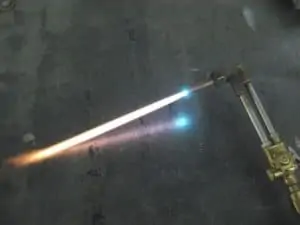
51. Plasma Cutter or Oxy/Acetylene Torch
When deciding between purchasing either a plasma cutter or cutting torch to start out with, you will need to have an idea of what kind of metal work you plan on doing the most of.
For me, even though I have both, I use a plasma cutter most of the time. However, I would rather have an oxy/acetylene torch if I could only have one. As a matter of fact, I lived without a plasma cutter up until about three years ago. They are great for doing what they are built to do but are limited in versatility compared to an oxy/acetylene setup.
For instance, when you purchase an oxy/acetylene kit they will typically come with the handle, the two necessary gas regulators, a gas welding tip and the cutting assembly. With this, you will be able to gas weld, cut steel, warm up frozen nuts and bolts for easier removal, heat steel for bending or reshaping into something more useful and many other things. See more detailed information about cutting torches for the beginner, here!
52. Do I need an Angle Grinder?
Unless you will be working on just pint-sized projects there should be at least a small angle grinder in your future. There is more versatility with a portable grinder than a bench grinder. A bench grinder can come later as your experience and projects expand. If you need a table grinder for your projects to start off with, be sure to have a sturdy table on the heavy side to bolt it down to. This will keep it from walking all over the floor due to vibration and pushing your work against the wheels during the grinding process.
When it comes to angle grinders, the 4.5″ will be perfect for most newcomers. All your favorite power tool manufacturers make one. There is a diverse selection of wheels and discs that can be used with just one 4.5″ angle grinder. Of course, there are the typical discs for grinding steel. There are discs for grinding masonry. Different cutting wheels can be bought for cutting either steel or masonry. Another good tool is the course, knotted wire wheel for cleaning and buffing tough stuff. If you need a lighter touch, a cup brush is available with the choice of nylon or steel bristles. The flapped wheel grinding/sanding disc is one of my favorites. The hook looped sanding pad that sheets of sandpaper with varying grits will attach to, is a great accessory.
53. Chop Saws are a Great Addition to your Shop
If you have a cutting torch a chop saw is not a mandatory piece of shop equipment. But it’s darn close. It’s kind of like a cruise control on your car, you can live without it, but it sure is nice to have. Chop saws are very handy for quickly cutting straight edges with the option on most of them to cut angles up to 45 degrees. When the torch hoses are all rolled up on the rack and you don’t really feel like breaking out the heat, open up the chop saw. You can have the material clamped down and cut in less time than it takes to pull out the flamethrower. The bonus is, you won’t need to do much if any, grinding before you start welding. Always keep at least one extra cutting wheel on hand.
Most major shop tool manufacturers make chop saws. I have one that uses a steel blade. The blades are quite a bit more expensive but last much longer than I thought they would. The good part is, you can use either a steel blade or fiber/abrasive type of wheel on it. You need to always wear hearing protection when using a chop saw, but with the steel blade, your neighbor’s dog will probably also need hearing protection.
54. Are Welding Tables Necessary?
Welding tables are very handy to have around. You can get by without one depending on a couple of things. Welding smaller items that are time-consuming warrants a table. Find one that fits your working area and is large enough to hold your stuff. For larger things, if you have enough concrete floor, driveway or patio space, you can get by without one. Granted, the younger you are the easier it will be to get by without one.
Having a piece of angle iron welded to one edge making a trough is very handy. If you are welding lengths of the material end to end this is the best way to keep everything lined up nicely. Just lay them in the trough and butt them up together before tacking.
For additional information please read my post, Do I Need a Metal Welding Table to Weld?
55. A Bench Vise is Nice
Attaching a vise is a great addition to the table as well. Vices come in handy for everything from holding your torch handle so you can clean the tip to acting as a third hand to hold your welding pieces while you tack them. Be sure to pick the best quality vice, large enough to do what you need it to do. Then buy the next size larger.
56. Soapstone is Best for Marking
For marking metal prior to cutting you are going to need some soapstone. I prefer the cylindrical sticks shaped like a pencil. Soapstone is akin to a hard chalk and shows up fairly well when looking at it through a dark lens when cutting. Buy it by the handful because I swear they crawl away when the lights go out.
57. Tape Measures, the Most Used Tool?
You will, of course, need a tape measure. The 25′ steel ones may be more than you will need but I would have at least one nearby in addition to a smaller lengthed one.
58. Squares are Us
An assortment of squares is a must. You can probably get by with a 1′ adjustable square and a framing square to start with.
59. Levels
For many projects, you will need a level. A torpedo level with a magnet along one side may be enough to get you started. You will want a longer one when the economy picks up.
60. Vice Grips
I find myself using vice grips quite a lot. Start with a standard pair of straight jaws. There are a probably a dozen designs with different style clamping jaws. You will quickly learn which ones will assist you best for your type of work.
61. Pliers
Nothing comes in handier than a standard pair of pliers for picking up and holding hot pieces of metal.
62. Gas or Flux Core Wire when MIG Welding?
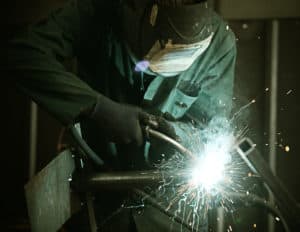
Let’s look at a few scenarios.
Scenario One:
All of your welding is expected to take place indoors on clean metals 24 to 12 gauge thick. 12 gauge is a little less than 1/8″ thick. 24 gauge is less than 1/16″ thick.
If all of your planned projects and repairs fall within the parameters of this scenario, I suggest a 115v MIG welder using gas with .025 diameter wire. The smaller wire will make it easier to weld the 24 gauge material. .030 wire will have a higher deposition rate and could also be used. The 115v will be the best for you in this scenario economically.
Scenario Two:
All of your welding is expected to take place indoors on clean metals 1/8″ to 1/4″ thick.
For MIG welding with gas and .035 wire on metals within this thickness range, I suggest you step up to a higher capacity 230v machine. This upgrade in amperage and wire diameter will allow you to make fewer passes. Thus, saving you a lot of welding time in the process.
Note: For MIG welding metals in excess of 1/4″ thick, a truly industrial machine with higher capacity will be necessary.
Scenario Three:
All of your welding is expected to take place both indoors and outdoors on metals 20 gauge up to 1/4″ thick.
We’ll need to move away from MIG and switch to .035 Flux-Core wire. This will not require a gas bottle but the positive and negative leads will need to be switched on the machine. What is great is that a 115v machine will be sufficient to do the job.
Note: this is more than double the thickness that can be GMAW welded with a 115v machine.
Scenario Four:
All of your welding is expected to take place both indoors and outdoors on metals 1/4″ to 1/2″ thick.
We’ll need to stay with Flux-Core wire and step up to the .045 diameter. This will require a 230v machine. This upgrade in amperage and wire diameter will allow you to make fewer passes. This will end up saving you a lot of welding time in the process.
Note: this is more than double the thickness that can be FCAW welded with a 115v machine.
For additional information please read my post, What is the Purpose of Flux and Shield Gas in the Welding Process?
Or, MIG Welding – Gas or Flux Core?
63. Remove Paint before Welding
In order to be confident the weld is as strong as it can be, you will want to make sure all potential impurities have no chance of contaminating your weld. Your welds will not only be stronger, they will look better. In addition, burning paint can be toxic and harmful if inhaled.
For additional information please read my post, Do I Need to Remove Paint Before Welding?
64. Guard Against Getting Shocked when Welding

Never weld when it is raining, snowing or when you are wet. This applies to the ground you are standing on as well.
To further reduce the potential for shock hazard, before each job inspect both leads from the point where they leave the machine to their respective ends. Have leads replaced at the first sign of worn, cracked or missing insulation. Always replace welding handles, electrode holders and ground lead clamps at the first sign of damage.
Additionally, to avoid electrical shock never touch the electrode, metal parts of the electrode holder or any exposed wire connecting the electrode holder to the machine. Also, avoid welding while standing on metal floors such as grating or scaffolding. Always replace damaged electrode holders immediately.
For additional information please read my post, Can I get Shocked While Welding?

65. Know your Legal Responsibility
If the projects that you work on will never leave your property and will never be used by anyone but you, you probably don’t have much to be concerned about.
As with installations, creations or repairs of any type, if it fails in some manner and a person or people are injured, a liability claim from the injured party or parties is almost to be expected. The same can be said even if only property is damaged.
As a hobby welder, you still need to manage potential risks. First, by identifying when your projects may impact the public negatively. That is, if the project or repair of a piece of equipment that you worked on, were to fail.
For additional information please read my post, Are there any legal liabilities associated with hobby welding?
66. Before you Cut with a Torch
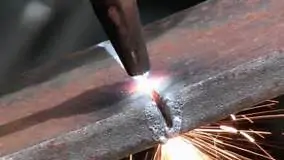
- Remove all flammable materials well away from the cutting area
- Flammable materials include dry materials such as paper, cardboard, sawdust and dry grass
- Station a fire extinguisher nearby
- Wear goggles and heavy leather gloves
- Wear flame retardant clothing or well fitting 100% cotton clothing with no frayed ends
- Good leather boots are recommended
- NEVER wear nylon or any synthetic or synthetic blend material around welding or cutting. It can melt to your skin.
- Have your metal marked with soapstone precisely where you want to cut. Soapstone will allow you to see the marked line just ahead of the torch tip.
- Only use a striker made specifically for igniting a cutting torch.
67. How to Light a Torch
With the bottle valves wide open and regulators set, lets light the torch. Make sure the torch tip is pointed away from you and not directed towards anything flammable.CSlightly crack open the acetylene valve and immediately ignite the gas leaving the tip with the striker. Adjust the acetylene valve until the yellow flame is approximately 10-12 inches in length.
- Open the oxygen valve on the bottom of the handle fully then, slightly open the second oxygen valve until the flame turns from yellow to blue.
- Continue adding oxygen until the inner, light blue flame begins to constrict down towards the tip.
- Once the light blue flame is pulled down to the crown shaped cone, press the oxygen lever on the back of the cutting torch. The light blue flame should not extend away from the tip. If it does, slightly reduce the oxygen volume by pinching back the valve all while the lever is still depressed.
68. Making the Cut
- Bring the tip down to the point on the metal where you want to start cutting.
- Keep the end of the light blue flame at the metal’s surface until bright red and near the melting point.
- Press the cutting lever and if the base metal is hot enough the additional oxygen will cause a reaction and the metal will begin blowing away from the tip. If the metal has not reached a high enough temperature there will be no reaction.
- With a smooth, steady hand, direct the tip along the marked path at a speed that allows the complete blow through of the molten metal until the cut is complete.
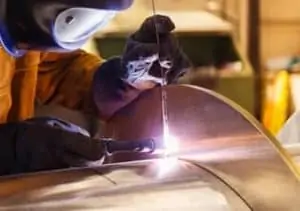
69. When is it Time for a TIG Machine?
- If you find yourself needing to weld razor blade thin metals on extremely low amperage settings, you might need a TIG welder.
- If an eye-pleasing weld is desired for highly visible parts, you might need a TIG welder.
- When extremely high-quality welds are necessary, you might need a TIG welder.
- If building race car or truck chassis out of chrome-moly tubing, you might need a TIG welder.
- If you weld a lot of non-ferrous metal like magnesium, copper, and aluminum, you might need a TIG welder.
70. Metal Artist in the Making?
Metal art takes many forms and has become a quite popular form of expression for artists. From beautiful custom designed gates to western styled napkin holders, the artist is limited only by his own imagination. Steel is a great medium to work since it is so forgiving. If something needs to be added, removed or changed, just do it. Wood, which if cut too short or shaved too thin becomes scrap heap material. On the other hand, steel can easily be added in order lengthen or thicken to taste.
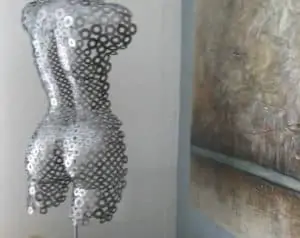
71. There is a never-ending supply of Material to use for Metal Art.
From used brake discs to old gears, artists have found ways to put these things together in an eye-pleasing fashion. In addition, some art is actually created to be functional. In my opinion, all finished welding projects can be considered art. I think that is what I like most about it.
72. Re-drying Non-Low-Hydrogen Electrodes
Most rods stored in dry, sealed containers are going to be good to use for a long time. However, if exposed to humidity for long periods of time, stick electrodes from opened containers may pick up enough moisture to affect welding characteristics or weld quality. If for any reason, moisture does appear to be a problem, you may choose to store your electrodes in heated cabinets at 100 to 120°F. It is possible that some electrodes from wet containers or extended contact with high humidity can be re-dried.
73. GMAW is not short for Grandma
GMAW is short for Gas Metal Arc Welding. It’s better known as MIG or Metal Inert Gas welding. To break it down further it is welding with solid wire using an inert gas to shield the weld from atmospheric contamination. GMAW is not good for welding outside or in drafty conditions. This is because the shield gas has a tendency to blow away before it can do its job. Compared to FCAW the welds will be more visually appealing and will have no slag to chip off. GMAW also welds thin metals with less burn through compared to FCAW.
74. FCAW
FCAW is short for Flux Core Arc Welding. This type of welding is done with the same wire machine as GMAW but doesn’t use gas to shield the weld. The wire is hollow and contains flux powder to shield the weld from atmospheric contamination instead of gas. FCAW is not as good as GMAW at welding very thin materials as it has a tendency to burn through easier. FCAW also leaves a coating of slag on the finished weld that must be chipped off. However, welding outside is not an issue with FCAW and penetration rates are typically better. FCAW can handle a little debris on the surfaces to be welded whereas GMAW needs the welding surfaces to be very clean.
75. The Klutch Compact Locking Welding Cabinet
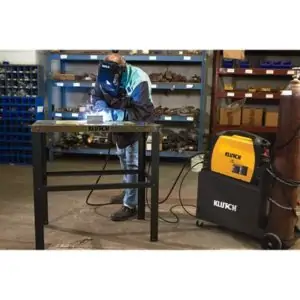
- Stands just 26in.H, allowing it to store under benches or shelving
- The sturdy metal frame can hold up to 135 lbs.
- Stowaway compartment with locking door is roomy enough to securely store your helmet, gloves and other welding supplies
- Built-in cable wrap hangers keep welding cables organized and prevent damage by holding them off the ground
- Two 6in. solid rubber tires and two 2in. solid rubber front casters provide easy mobility
- Sturdy steel construction with a durable powder-coat finish
- 32in.L x 19in.W x 26in.H overall size
- Shipping weight 47 lbs
- 6″ rubber wheels on the back
- 2″ solid rubber wheels on front casters
76. Why buy a Lincoln Electric Pro MIG 180?
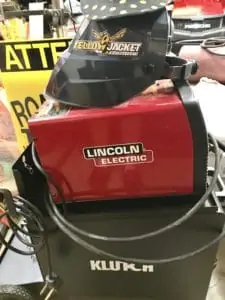
When I began the process of looking to add a MIG welder to my shop it was only natural for me to look at what Lincoln Electric had to offer. Especially, since I have owned a Lincoln Electric 225 amp AC/DC stick welder for the last 30 years and have never had a single issue with it. In addition to that, I have owned a Lincoln Electric, “Ranger 225,” engine driven welder for the past fourteen years. The Ranger now belongs to my son who needs it more than I do out on his ranch. It’s nice when equipment lasts so long that you can pass it down to your kids!
I’ve owned my Lincoln Electric Pro MIG 180 for over a year now and enjoy it immensely.
77. More Welding PPE
Never wear Polyester or Polyester Blends when Welding or Cutting – Polyester will melt to your skin!
Flame resistant welding shirts can be purchased with an extended collar to keep UV rays off your upper chest and lower neckline. They will also help keep hot sparks from going down your shirt. Extended collar or not, consider buying an extra size larger in order to fit over your regular clothes for welding under colder conditions. Other options for protecting your upper body are sleeves, capes, and aprons.
We must protect everything from the waist down from the same hot sparks, UV rays, and hot metal. Heavy denim jeans will work for most situations. However, any heavy cotton and flame resistant cotton welding pants will work to cover you from the ankles up. One thing you don’t want are cuffs on the legs. They make great spark traps.
It is best to wear leather shoes or boots. Do not wear tennis shoes with thin tops.
78. Rotate your Cutting Torch Tip
Once the metal has started to cut, rotate the tip slightly towards the direction of travel to obtain best results.
79. Wear a Welding Cap
Welding caps are designed to keep hot sparks from burning the head, neck, and ears. If you have ever had the pleasure of hearing your own ear wax sizzle due to hot metal finding its way into the ear canal, you may benefit from a cap designed for welders.
80. Use a Cheater Lens in your Helmet
If you need cheaters to read take advantage of the magnifying lens holder in your helmet. Purchas a variety of magnifications close to what you normally wear. When you find yourself in a position where you must be close to your work due to lack of headroom, increase to a higher magnification or use your readers in conjunction with the magnifying lens.
81. SMAW
Shielded Metal Arc Welding a.k.a. Stick Welding – A process that welds by heat from an electric arc, between a flux-covered metal electrode and the work. Shielding comes from the decomposition of the electrode covering.
82. Best Footwear for Welding
Leather boots are the best protection against hot sparks and slag. If you wear lace-ups keep an extra set of laces handy. The red-hot sparks burn them up a little at a time.
83. Having Trouble with the External Adjustment Knob on your Welding Helmet Getting Bumped?
One problem often reported with helmets having an external knob controlling the shade adjustment is that it often too easily changes the setting when bumped. If the helmet has a grind mode this could cause your eyes to receive an unexpected weld flash. Since it is practically a law that all real men keep duct tape on their premises, simply take a small piece to make your knob more secure.
84. Use Nozzle Gel when MIG Welding
To prevent spatter buildup around the welding tip occasionally dip the tip in a quality nozzle gel. This comes in extremely handy when welding with flux-core wire which is bad about creating excessive spatter. PAM cooking spray will also work if you are in a pinch.
85. Put the Steel Caps back on Gas Bottles when Not in Use
Put the steel caps back on all pressurized bottles, oxygen, acetylene, etc., immediately after removing the regulators. If they were to fall or get knocked over breaking the valve off with pressure inside, they become a true bottle rocket. Not to mention the flammability of the fuel gas acetylene.
86. Clean your Cutting Torch Tip Often
One of my biggest pet peeves in the welding world is picking up a torch with a dirty tip. Many times the flame is so bad you wonder how it was cutting anything, to begin with. You know it was doing a poor job when last used. It really doesn’t take that much time to secure the torch and pull out the tip cleaners and poke the holes clean. Your cuts will be much neater.
87. Don’t Breath the Welding Fumes
Always work in a well-ventilated area. If possible, have a small fan helping to keep the welding fumes away from your face. Be careful that your ventilation does not blow directly on your weld if you are MIG welding. You don’t want to blow the shield gas away from the weld.
88. Keep a Clean Work Area
A cluttered work area can be dangerous. Remove all trip hazards and everything flammable for a distance of 20 feet. When working, we tend to move around repositioning ourselves wearing helmets, goggles, dark safety glasses and face shields. We could easily stumble. There is little more dangerous than stumbling with wire rods, flames or high RPM grinders in our hands.
89. Have a Decent Amount of Storage Area
This relates to the previous tip. Having a place to store everything and having everything in it’s place automatically creates a cleaner work area. And what’s great is, you should know exactly where to go to find what you need when you need it. Don’t be like some who spend half their time looking for the tool they had in their hand just five minutes ago.
90. Young Upcoming Career Minded Welders Should Learn all Disciplines
From the certified pipeliners of West Texas to the race car and truck fabricators and all the high and low tech welding jobs in between, there is no doubt that the more welding disciplines you know the more options you will have in your career choices.
91. Use your Off Hand to Steady the one Holding the Welding Lead
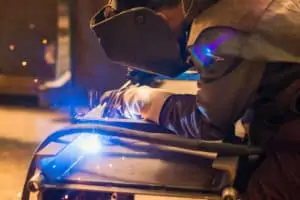
While not always possible, anytime you can rest your off hand on something steady and then use it to help hold your welding hand steady (Stick and MIG) , you should take advantage of it. Your welds will be more precise and look more professional.
92. Turn Off and Unplug your MIG welder when Changing Wire
The inside of the box is always hot somewhere even with the switch turned off. Nothing can bite you if you are unplugged.
93. Use a New Brush when Cleaning Aluminum
Aluminum must be very clean before welding. Your old standby brush used for brushing steel will embed impurities in the softer aluminum. Your welds will suffer because of it.
94. Protect your TIG Torch
Pick up a couple of neoprene golf club head covers to put on your TIG torch when not in use. They fit well and will help cushion the blow if dropped possibly saving the cup from breaking.
95. Better Stick Welding Starts
Try striking your arc like a match then briefly holding an arc length of one inch above the start area. This pre-heats the metals enough so that your puddle will form almost immediately. No more globs at the start of your welds.
96. Coat your Helmet Lens with Rain-X
Smoke film and spatter won’t adhere to the clear lens as readily. And, they will wipe clean easier making them last longer.
97. Cleaning Aluminum
Try using a 60 grit flap wheel on a 4 1/2 ” angle grinder. The 60 grit is rough enough to clean well yet fine enough to leave a more polished surface. Many TIG welders feel a smoother aluminum surface welds better than one left rough.
98. Tungsten Rod Tip
Cut a new tungsten rod in half and sharpen both ends of both halves. This should get even the newest newbies through the day.
99. Removing a Bolt that has Broken Off Flush
Weld a thick washer which has a hole slightly smaller than the diameter of the bolt, to the bolt from the inside of the washer. Then weld a nut to the washer. You should be able to wrench out the broken bolt.
100. Never Torch Cut Directly above a Concrete Floor
Concrete holds water in its pores. If you heat the water, it will expand violently exploding pieces of concrete in all directions.
101. Note where your Oxy/acetylene Hoses Are
Before starting your cut make sure your hoses are out of the way. Molten slag and red-hot pieces of cut off steel can damage and possibly pierce the hoses creating a fire where there isn’t supposed to be one.
